Sending Emails in BC
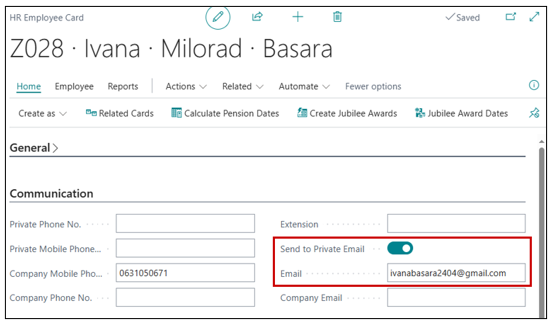
First, you need to set up the sending address on the employee card. On the card itself, you can specify whether you want to send emails to a private or business address. All settings are configured on the Communication tab, as shown in the images.
If you choose to send to a private e-mail address.
If you choose to send to a business e-mail address.

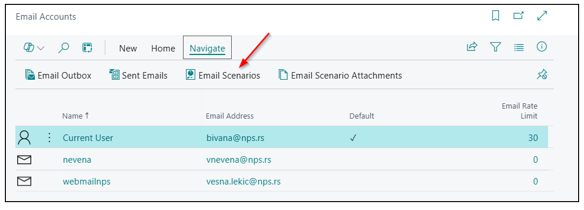
To set up email sending from Business Central, the first step is configuring the Email Accounts page. Type Email Accounts in the search bar and open the corresponding page.

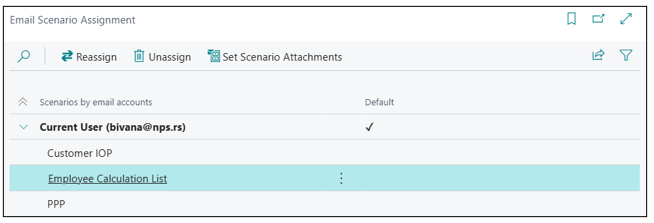
Click on the scenario assignment where the Current User is set as the sender.
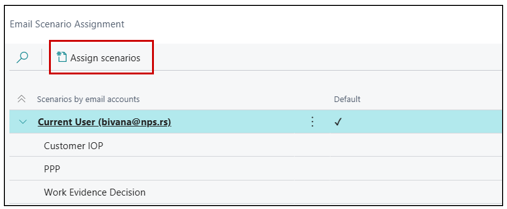
It will be assigned to the Current User.
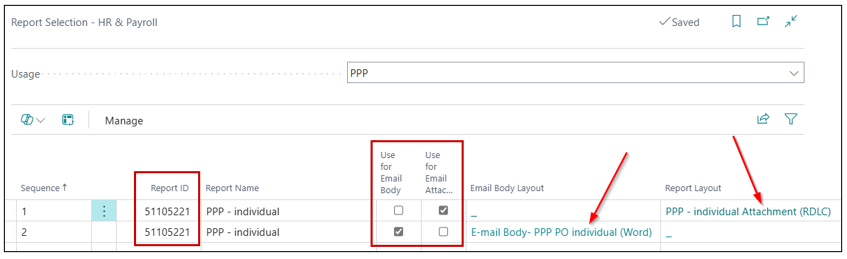
Report Selection – HR & Payroll
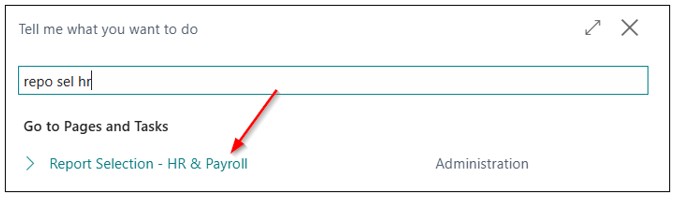
Enter Report Selection – HR & Payroll in the search.
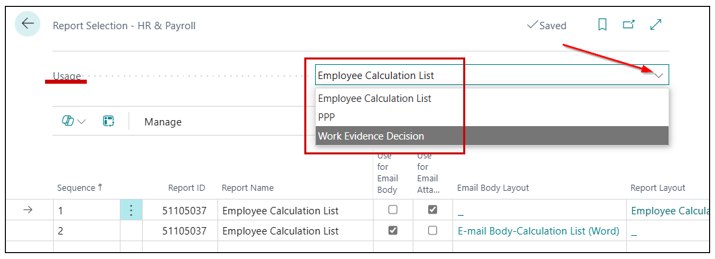
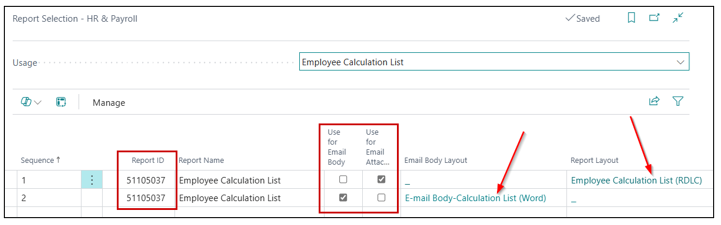
It is necessary to enter the report ID and select the email body and email attachment with the layout and report preview, as shown in the images below.
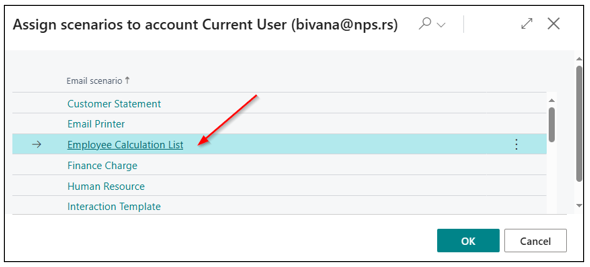
Employee Calculation List
Send Employee Calculation List
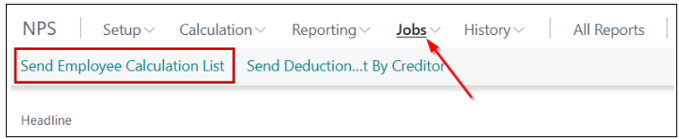
A new page for filling in the information will open.
Sending Emails to Creditors
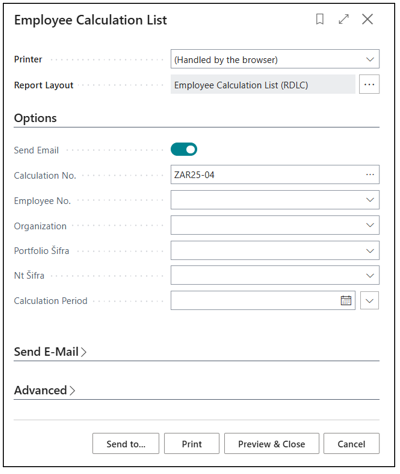
To be able to send emails to creditors, you need to enter their e-mail address on the vendor (creditor) card. After payroll has been processed and payments have been made, you can send emails to creditors to provide them with information about the payments made to them.
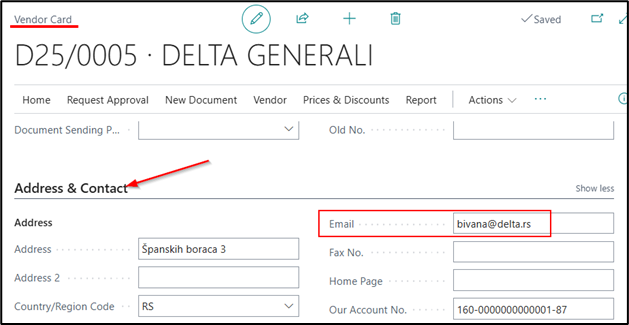
Report Selection – Purchase, you need to have the report ID for the e-mail body (51105077) and the e-mail attachment (51105077). On the page, the creditor is selected, as shown in the image.
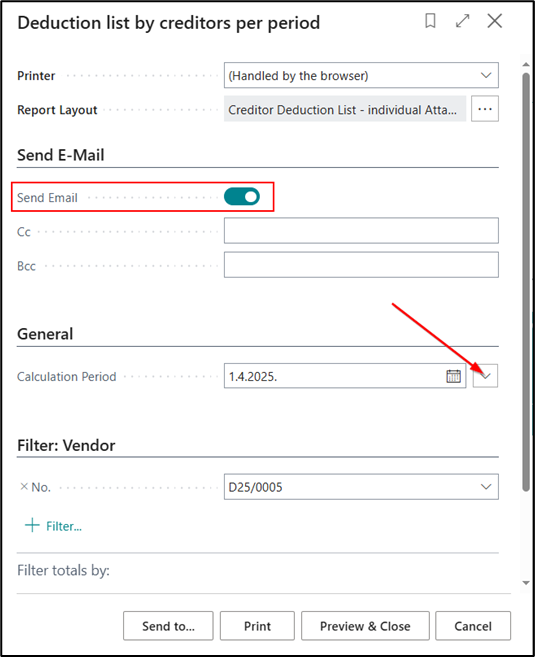
Sending emails is enabled via the Jobs function – Send Deduction List By Creditor.
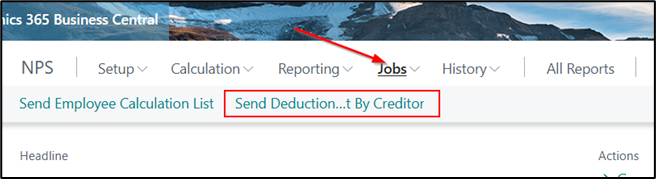
On the page, you need to check the Send email and be sure to select the calculation period. Entering the vendor (creditor) number is optional – if not entered, the e-mail will be sent to all creditors for whom deductions have been calculated in the selected calculation period.
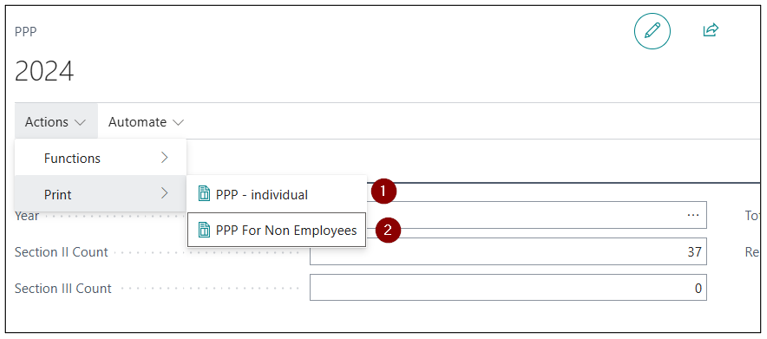
PPP Form
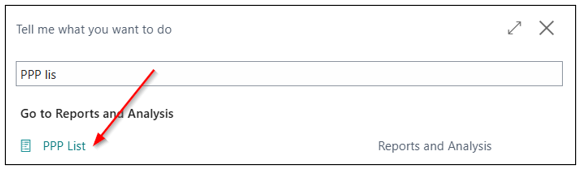
The PPP form is sent from the PPP list.
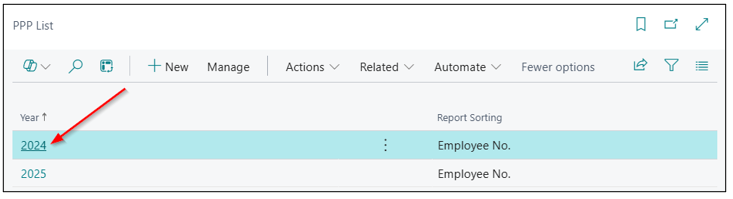
You can choose to send the PPP form for employees and for non employees, if any payroll calculations were made for non employees.
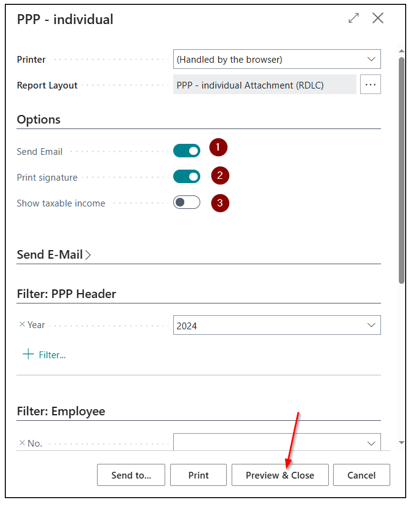
- Send email – if the field is checked, the email will be sent; if it is not checked, a preview form will open.
- Print signature – if the field is checked, the director's signature will appear on the PPP form; if it is not, the document will be without a signature.
- Show taxable income – if the field is checked, the taxable income will be displayed on the document.
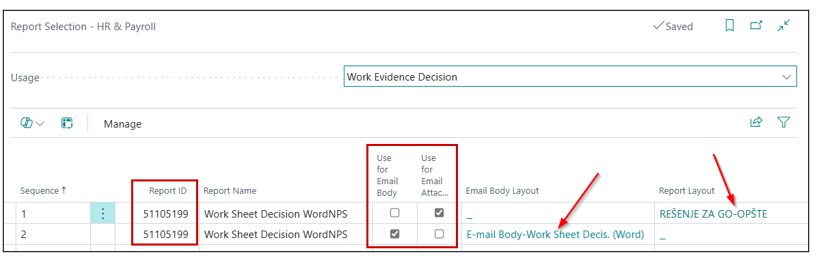
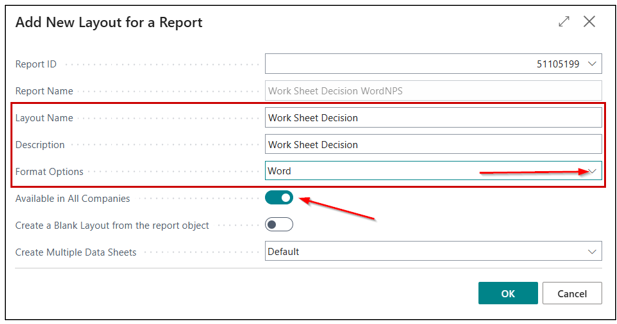
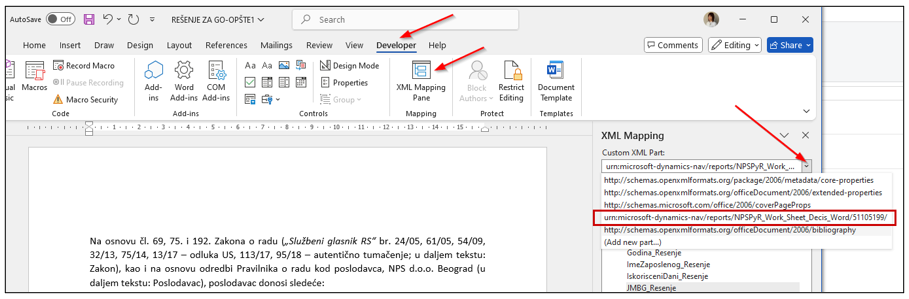
Work Sheet Decision
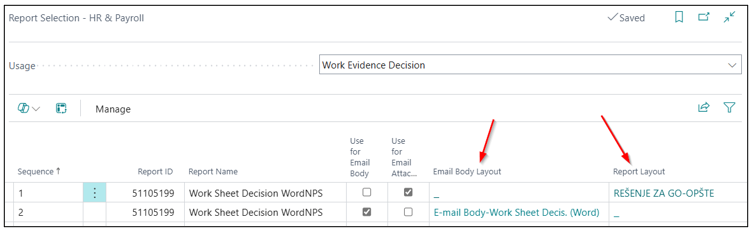
It is configured on the Report Selection – HR & Payroll page by choosing the Work Evidence Decision, as shown in the image, and setting the report ID to 51105199.
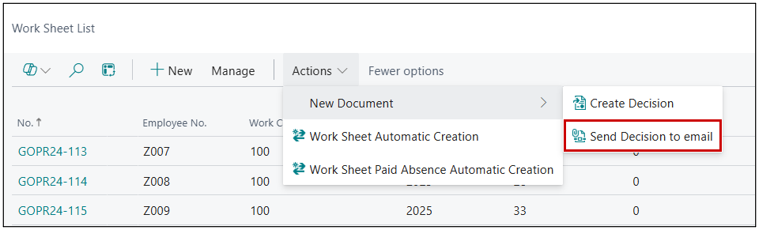
The Work Sheet Decision is sent from the Work Sheet List page.
Email Attachment and Body (Changes and Customization)
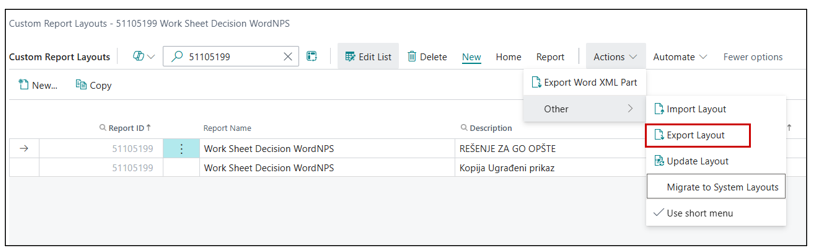
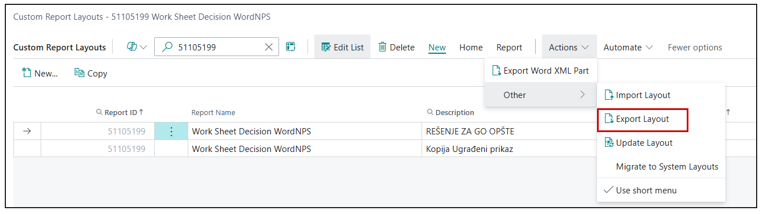
In the following text, it is explained how to modify the e-mail body or attachment; the steps are the same for both the body and the attachment. For the Work Sheet Decision, it is necessary to set, i.e., map the report display. Each user can create the decision according to their needs. This is done on the Custom Report Layouts page. Here, it is essential to export the file that will be mapped.
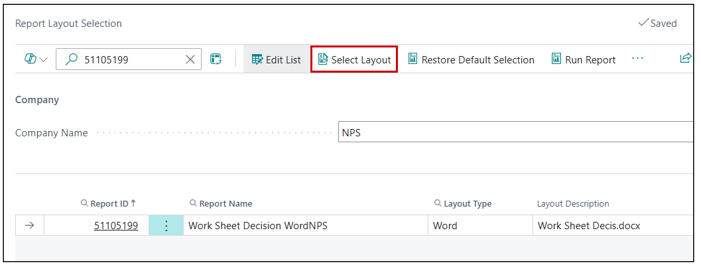
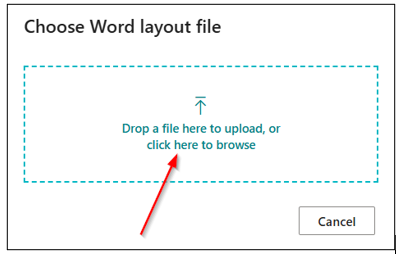
After entering all the relevant data into the file, the import is done on the Report Layout Selection. Choose the Select Layout action as shown in the image.
The New action is selected to create a new report layout. Then, the Name, Description, and Form fields are filled in, as shown in the image below.

After the import, a new row will be created on the Report Layouts page, and the layout that was created will be assigned.
After it has been created, you need to return to the Report Selection – HR & Payroll page, where you will select the created report for the Report Layout or the Email Body Layout field, depending on whether you are modifying the e-mail body or the attachment.
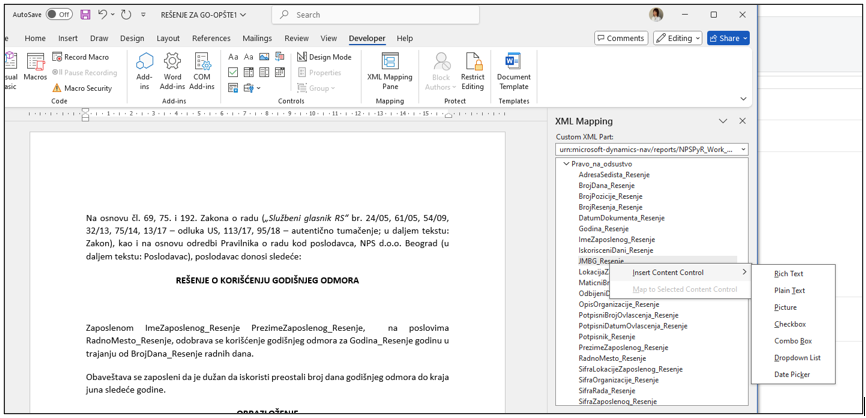
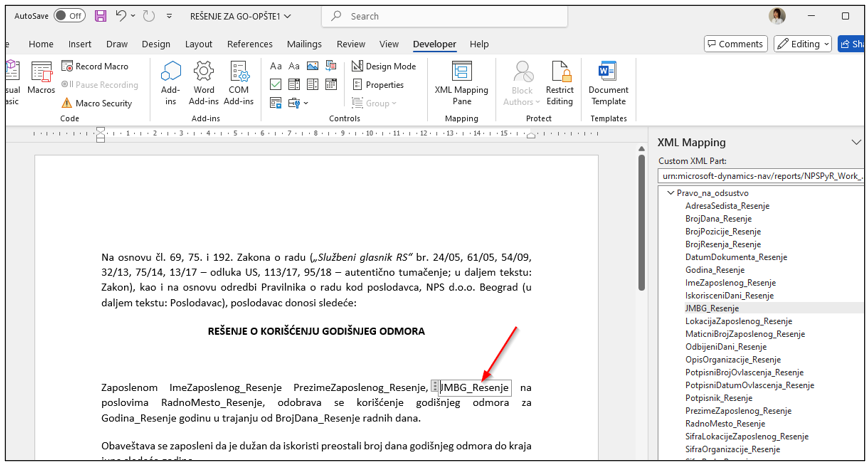
Report Mapping
In order to transfer employee data into the email attachment, it is necessary to perform mapping on the attachment (Word document) that is being sent. In the following text, we will explain how to map the attachment being sent. Our example will be the Work Sheet Decision. The first step is done on the Custom Report Layouts page, where the file is exported, as shown in the image.
The mapped text will appear where the cursor is placed, using INSERT CONTENT CONTROL – RICH TEXT.
Template Selection by Employee
If you want a specific employee to receive a different e-mail, this can be set on the Employee Profile tab by selecting the document layout.
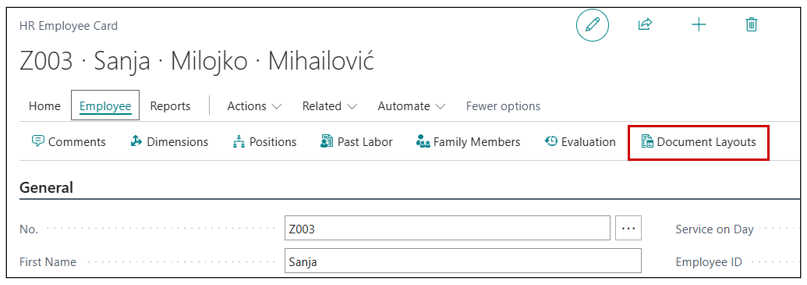
A new page will open where you can approve the new attachment and body. The change can be made by selecting a different Email Body Layout and Email Attachment Layout. By clicking on the field, a new page will open for selection.

Sending the locked PDF document to the employee
The Work Sheet Decision, PPP form, Employee Calculation List, and other similar documents contain sensitive employee information that is sent by e-mail. To safeguard this data, the option to password-protect PDF attachments is available.
This functionality is set up on the Payroll Setup page, under the PDF Locking tab. Once the option is activated, PDF documents sent to employees will be automatically password-protected, ensuring secure data transmission.
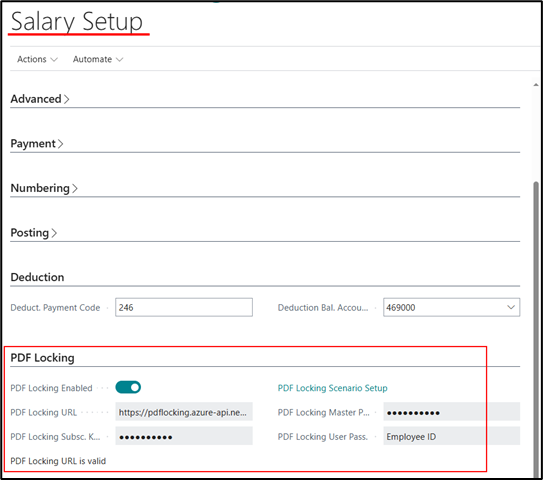
- PDF Locking Enabled – Specifies whether PDF locking is enabled.
- PDF Locking URL – Specifies the URL value of the PDF locking service. To obtain the appropriate URL, click on PDF Locking URL is valid.
- PDF Locking Subsc. Key – Specifies the subscription key value for PDF locking. To obtain the key, you need to contact the administrative support of your implementation partner (NPS).
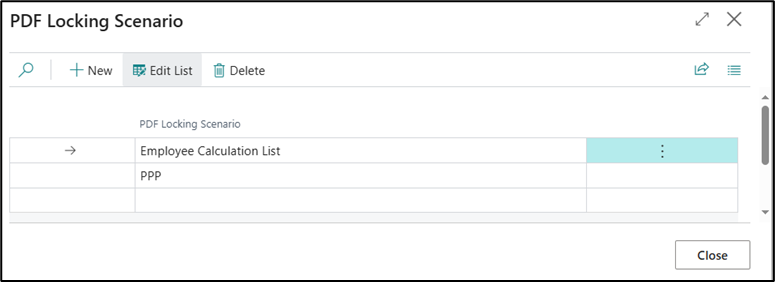
- PDF Locking Scenario Setup – By clicking the link, a page will open where you can enter the scenarios you want to be locked when sending emails.
- PDF Locking Master Pass – Allows you to define a unique password that will be used to unlock protected PDF documents. If this field is filled in, all PDF files sent will be locked with the same predefined password. This way, the master password applies to all sent PDF documents.
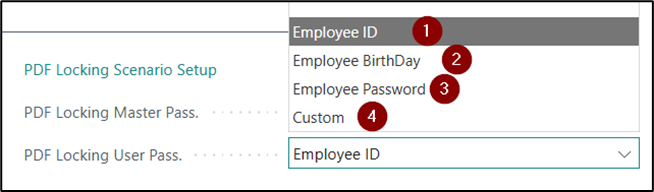
- PDF Locking User Pass. – Allows the employee to unlock the email attachment (PDF) by entering a password, which can be one of the following:
1 Employee ID,
2 Employee Birthday,
3 Employee Password – a password created by the employee,
4 Custom – enables a specific implementation for managing the password used to lock e-mail attachments.
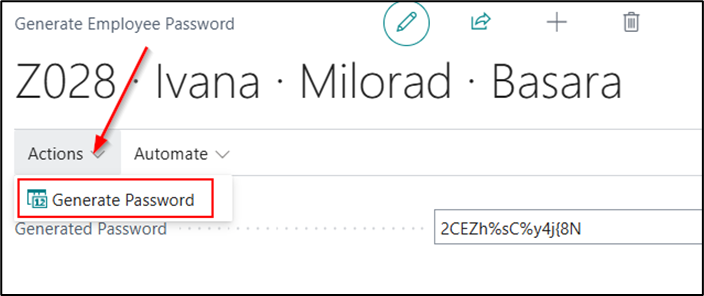
Generate Employee Password
The employee creates their own password, which will allow them to open the PDF file received by e-mail. To enable this, the password must first be entered on the HR Employee page → HR Employee Card → Related → Generate/Modify Password. This way, the document can be opened only by the employee who set the password.
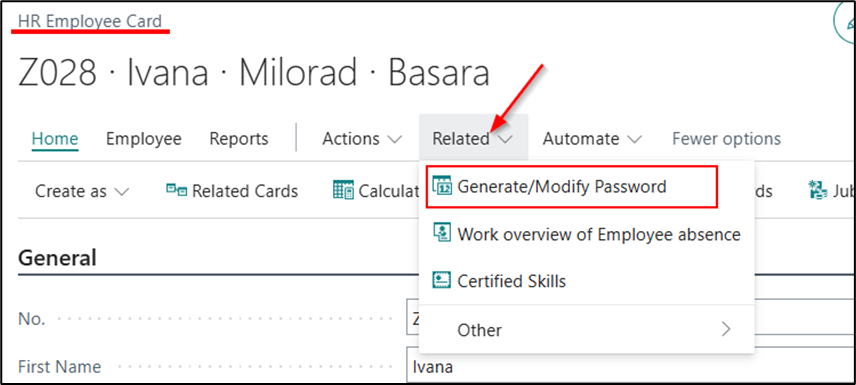
A new page will open where the employee can enter a password of their choice. By clicking the Generate Password function, the system will suggest a password, which can then be modified as desired.
Need more help?