Pregled funkcionalnosti NPS Lokalizacije - Srbija
Svrha uvoza petaka za Lokalizaciju
-
Uvoz paketa pomaže vam da se upoznate sa NPS lokalizacijom i njenim funkcionalnostima.
-
Obezbeđuje specifične podatke u skladu sa paketom koji izaberete, imate mogucnost odabira.
Vrste paketa Lokalizacije
-
Dostupne su tri vrste paketa (Samo podešavanje, Testni podaci, Kompletni testni podaci).
-
Svaka vrsta je prilagođena različitim potrebama kompanija.
Preporuka za okruženje u koje se uvozi Lokalizacija:
-
Da biste izbegli da uvoz paketa zameni postojeća podešavanja u produkcionom okruženju, nemojte uvoziti direktno u produkciju, osim ako je produkciono preduzeće prazno, bez podataka.
-
Uvek koristite prazno okruženje ili sandbox za testiranje uvoza paketa.
Kako uvesti paket za Lokalizaciju?
Proces uvoza lokalizacionog paketa je jednostavan i sastoji se od sledećih koraka:
-
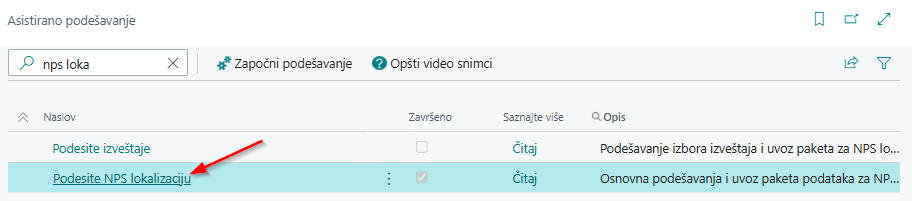
U pretragu unesite Asistirano podešavanje.
-
Otvoriće se stranica Asistirano podešavanje, gde u polju za pretragu možete uneti NPS lokalizacija i izabrati je.
Osnovno podešavanje NPS lokalizacije
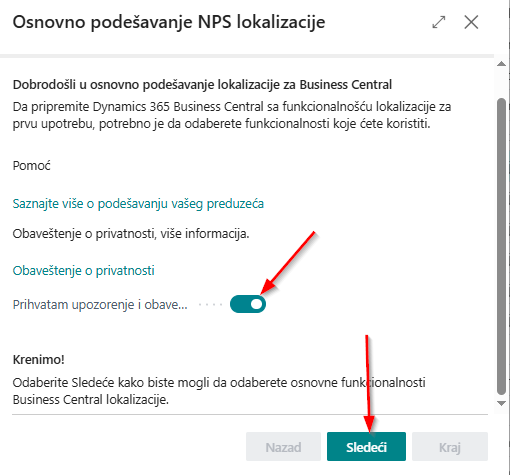
Stranica Osnovno podešavanje NPS lokalizacije će se otvoriti, gde ćete imati sledeće korake:
-
Prihvatam upozorenje i obaveštenje o privatnosti, čekirajte kvačicu.
-
Kliknite na zelelo polje Sledeće, kako biste nastavili dalje.
Tip podataka - Osnovno podešavanje NPS lokalizacije
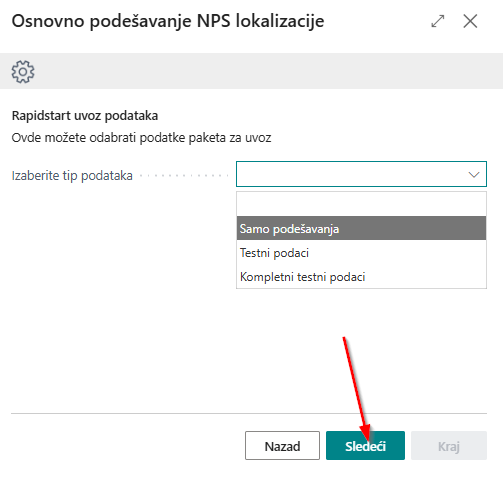
U sledećim koracima dobićete mogućnost izbora tipa podataka:
-
Samo podešavanje
-
Sadrži konfiguracione podatke - osnovana podešavanja za rad i dalji unos.
-
Sadrži definisane brojčane serije i kontni plan.
-
Kartice kupaca, dobavljača, osnovnog sredstva, artikal se moraju kreirati u BC kada preuzemte ovakav paket.
-
-
Testni podaci
-
Sadrži konfiguracione podatke i primer podataka spremnih za knjiženje.
-
Sadrži definisane brojčane serije, kreirane kartice kupaca i dobavljača, artikle, osnovna sredstva, kontni plan.
-
-
Kompletni testni podaci
-
Sadrži konfiguracione podatke i kompletne primerke proknjizenih podataka.
-
Sadrži definisane brojčane serije i kontni plan.
-
Sadrži knijiženja na stavkama kupaca, dobavljača, artikla, osnovnog sredstva, prihoda, rashoda.
-
Glavna knjiga sadrži sve zabeležene transakcije.
-
Akcija preuzmi paket - Osnovno podešavanje NPS lokalizacije
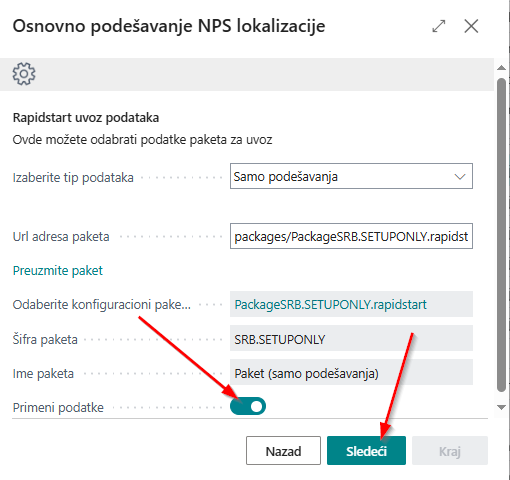
Nakon odabira tipa paketa, potrebno je da kliknete na akciju Preuzmi paket.
- Pojaviće se poruka: „Da li želite da sačuvate paket na klijentski računar?“ Business Central vam nudi mogućnost da paket preuzmete i sačuvate na svom računaru. Potrebno je da izaberete Ne.

Kvačica primeni podatke - Osnovno podešavanje NPS lokalizacije
Nakon što ste odaberali konfiguracioni paket na stranici Osnovno podešavanje NPS lokalizacije, čekirajte kvačicu Primeni podatke i kliknite na zelelo polje Sledeće, kako biste nastavili dalje.
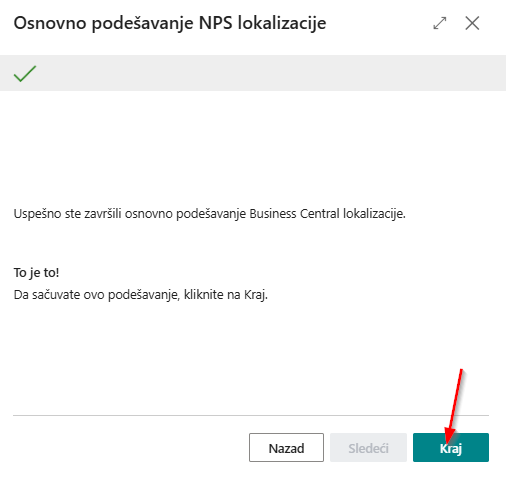
- Dobićete potvrdu rečenicom - Uspešno ste završili osnovno podešavanje Business Central lokalizacije, idite na zeleno polje Kraj.
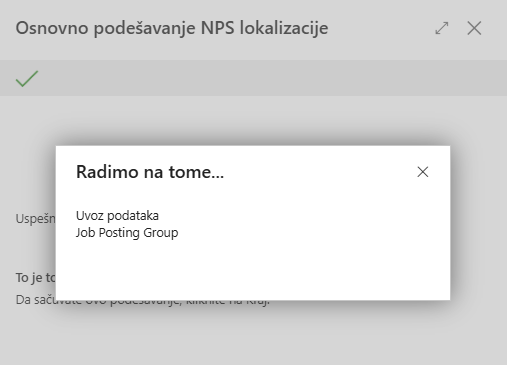
- Uvoz ce potrajati nekoliko minuta, nakon toga mozete da počnete sa daljim radom u vašem Business Centralu.
- Uveženi paket se moze videti na stranici Paketi za podešavanje.
Podaci o preduzeću → Iskustvo korisnika
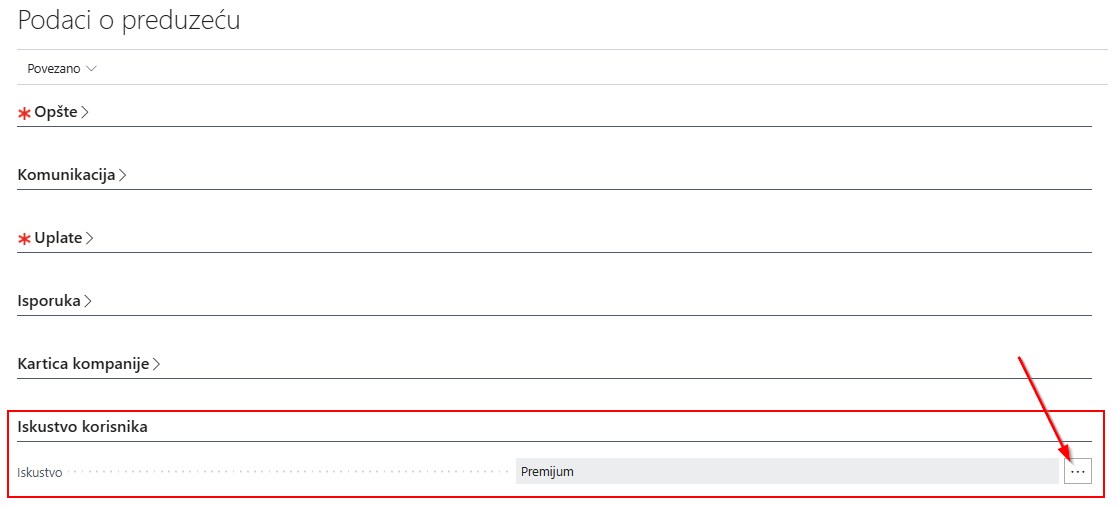
Nakon završetka svih koraka za uvoz paketa, potrebno je izvršiti dodatnu konfiguraciju u okviru stranice Podaci o preduzeću → Iskustvo korisnika → Premium:
-
U polje za pretragu unesite Podaci o preduzeću kako biste pristupili stranici Podaci o preduzeću.
-
Na tabu Iskustvo korisnika odaberite → Premium
Sve funkcionalnosti opisane u korisničkoj MC dokumentaciji za Business Central podrazumevaju Premium iskustvo, koje obuhvata kompletan skup elemenata korisničkog iskustva.
Integracija sa web servisom Narodne Banke Srbije
Ovaj modul omogućava povezivanje sa servisom Narodne banke Srbije radi preuzimanja i ažuriranja podataka, čime se obezbeđuje pouzdani i tačni podaci.
Servis takođe nudi brojne funkcionalnosti koje olakšavaju upravljanje podacima. Među njima je i preuzimanje podataka za:
-
Lokane banke
-
Valute
-
Grupne delatnosti
-
Regioni (Teritorije)
-
Države
-
Podaci o poslovnom partneru
-
Račune u banci kupaca i dobavljača
Svi preuzeti podaci olakšavaju dalji rad i neophodni za pravilno funkcionisanje modula.
| Feature | Description | Release |
|---|---|---|
| Podešavanje servisa | Prvi koraci u procesu podešavanja servisa objašnjeni. | |
| Način primene funkcionalnosti | Objašnjeno je kako se funkcionalnost praktično koristi. | |
| Kreiranje poslovnih partnera | Efikasan unos podataka |
Elektronski platni promet
Funkcionalnost Elektronski platni promet predstavlja modul u okviru kojeg se upravlja bankovnim računima, prati njihovo stanje i obavlja elektronsko plaćanje. Modul obuhvata sledeće procese:
-
Kreiranje predloga plaćanja dobavljačima i zaposlenima, pri čemu se generiše nalog za plaćanje i priprema XML datoteka za dalji uvoz u aplikaciju za elektronsko plaćanje (Halcom i Office Banking).
-
Uvoz izvoda u XML formatu koja je prethodno izvezena iz aplikacije elektonskog placanja (Halcom i Office Banking).
| Feature | Description | Release |
|---|---|---|
| Podesi bankovne račune | Ova funkcionalnost zahteva kreiranje bankovnih računa, br. serije i grupe naloga knjiženja. | |
| Poziv na broj – podeš. prodaje i potraživanja | Omogućava automatsko generisanje poziva na broj na prodajnim dokumentima, što olakšava njegovo prepoznavanje prilikom knjiženja izvoda. | |
| Platni promet i računi u banci | Ova funkcionalnost objašnjava status naloga elektronskog plaćanja, preuzima otvorene stavke dobavljača ili zaposlenih i prikazuje proceduru knjiženja izvoda. |
INS - Instalment on Sales and Purchase
This functionality has been developed as a result of the need for document archiving with different dates of arrival. How to set up Instalment: Setting changes are performed in the Payment Terms table. In search type Payment Terms. A new term of payment needs to be created, enter the code in the tab and select in the field Type -Installments. After which a new Action called Installment calculator is initiated, in which you populate the number of installments and period length. In the field length of the period enter duration of periods. For example: one month - 1M, one year - 1Y, needs to be entered.


How to use Instalments:
This functionality is used in the same manner for both sale and purchase. After entering all the necessary data, in the header and lines of the document in the Invoicing tab, you need to select the code for the payment terms code that we have created earlier. If is necessary you can change the number of installments, level of installments or the due date in the document by clicking on the statistic; in the Installments tab it is possible to make any required changes before posting document. After posting, the same number of customer-vendor entries is being created as per the number of installments, with different due dates.


CCV - Contact Customer Vendor same No
This functionality was developed due to the need that when creating a Customer/Vendor from a contact card (existing or newly created), the number series does not increase, that is, that the same number series is used for both the contact and the Customer/Vendor created from that contact, and vice versa, when a Customer/Vendor has created first, the Contact will be created automatically (or through processing Create contacts and will have the same number series as the previously created Customer/Vendor. This refinement enables the need to record the relationship with one business partner as a Customer/Vendor, and also enables an overview of the Balance (outstanding liabilities) of the Customer as a Vendor and vice versa.
Setup
New Vendors can be created in two ways:
New Customers can be created in two ways:
When entering a contact, it is possible to enter additional information, e.g. economic sector of business, type of business relationship, mail groups, addresses. If the Customer/Vendor is created from the contact card, all data that already exists on the contact will be transferred to the Customer/Vendor card, and vice versa, if the contact is created from the Customer/Vendor card, all data that exists on the Customer/Vendor will be transferred to the contact.
In order to be able to create a new vendor/customer/contact same No, it is necessary to enter the keyword Marketing settings in the quick search, then on the Numbering tab mark the fields Vendor same No. and Customer same No .


It is necessary to set the number series in the field Vendor Nos . This is done from the Purchases & Payables Setup page.

It is necessary to set the number series in the field Customer Nos . This is done from the Sales & Receivables Setup page.

PRA - Payables Receivables Accounts
The functionality will not allow apply entries two different posting groups.
- The Customer Posting Group is added to Detailed Customer Ledger Entries.
- The Vendor Posting Group is added to Detailed Vendor Ledger Entries.


Filtering by posting group is enabled on the following reports:


PHI - Physical inventory posting
This functionality secures possibility to check for inventories on hand and compare them with real inventories count, with the purpose of posting discovered surplus or shortage.
Also, it provides possibility to reclassify items, regarding changing items dimension, location code, serial no., lot no. or variant.
In this section:
| Feature | Description | Release |
|---|---|---|
| Physical inventory orders | Inventories can be counted multiple times for one order/location, for example when item groups need to be assigned to different employees. | |
| Item reclassification | Items reclassification, change of dimensions, tracking codes, variants or location codes | |
| Physical inventory posting | Physical inventories calculation and comparison to items on hand, posting of surpluses or shortages |
DPO - Document-Printout
Every company needs efficient tools to keep track on its assets and obligations and have simple and fast ways to gain those information.
Our reporting functionality provides you with such tools and simplifies your everyday analyzing processes.
In this section:
Set up NPS Report
A wizard NPS Report Selection Setup Wizard has been created that asks if the user wants to use localization reports or standard documents.

After you accept warning and privacy notice you are able to step forward on selecting the right package for you.
There are three options:
- Empty ,
- Standard Report - use standard document prints,
- Localization Report - use localization document prints

After you select desired package data click on Download package first, then after it is downloaded check Apply Package option and then you are ready to proceed forward, click Next.

That's it! You have required data. Depending on what the user chooses in the background, the corresponding package will be imported automatically. After you click Finish the package will be applied to your company.
Substitute Document Report The following standard reports have been replaced in the Localization Report package:
| Standard Report ID | Standard Report Name | New Report ID | New Report Name |
|---|---|---|---|
| 1304 | Standard Sales - Quote | 49021061 | NPS Standard Sales - Quote |
| 1306 | Standard Sales - Invoice | 49021041 | NPS Standard Sales - Invoice |
| 1307 | Standard Sales - Credit Memo | 49021046 | NPS Sales - Credit Memo |
| 208 | Sales - Shipment | 49021045 | NPS Sales - Shipment |
| 1302 | Standard Sales - Pro Forma Inv | 49021053 | NPS Sales - Pro Forma Invoice |
| 407 | Purchase - Credit Memo | 49021054 | NPS Purchase - Credit Memo |
| 408 | Purchase - Receipt | 49021050 | NPS Purchase - Receipt |
| 5911 | Service - Invoice | 49021048 | NPS Service - Invoice |
| 5912 | Service - Credit Memo | 49021055 | NPS Service - Credit Memo |
| 5913 | Service - Shipment | 49021056 | NPS Service - Shipment |
| 7309 | Whse. - Posted Shipment | 49021049 | NPS Whse. - Posted Shipment |
| 7308 | Whse. - Posted Receipt | 49021059 | NPS Whse. - Posted Receipt |
| 5704 | Transfer Shipment | 49021086 | NPS Transfer Shipment |
| 5705 | Transfer Receipt | 49021087 | NPS Transfer Receipt |
| 5875 | Phys. Invt. Order Diff. List | 49021070 | NPS Phys. Invt. Ord. Diff. Ls. |
| 5878 | Phys. Invt. Recording | 49021065 | NPS Phys. Invt. Recording |
REP - Reporting
Every company needs efficient tools to keep track on its assets and obligations and have simple and fast ways to gain those information.
Our reporting functionality provides you with such tools and simplifies your everyday analyzing processes.
In this section:
| Feature | Description | Differences from standard reports |
|---|---|---|
| Customer - IOP | Customer - IOP is a report that shows customer's invoices that are partially paid or not paid. | |
| Vendor - IOP | Vendor - IOP is a report that shows vendor's invoices that are partially paid or not paid. | |
| Purchase Price Calculation | The purchase calculation shows the item charge costs associated with that receipt as well as the unit cost. | |
| NPS Inventory - Transaction Detail | This report shows the value and quantity changes in the condition of items by locations and document numbers. | Added columns |
| Stock List | Stock list is a report that shows the availability of items by location in the quantity expressed in their units of measure. | |
| NPS Customer - Detail Trial Balance | This report enlists all transactions by document type and date, providing possibility to check and analyse amounts in both local and foreign currencies. | Customer posting group filter |
| NPS Customer - Summary Aging Simp | This report shows the amounts due by period, for the selected customer during the selected period. | Customer posting group filter, extended customers balances due up to over 360 days |
| NPS Customer - Sales list | Valuable report when it comes to getting fast information about sales in one place. | Customer posting group filter |
| NPS Customer Balance to Date | This report helps to inquire information about balance per customer on the specific date. It shows all customers that have open balance. | Customer posting group filter |
| NPS Customer - Trial Balance | It shows changes in receivables balances over a certain time period, both on credit and debit side, with possibility to filter by customer posting groups. | Customer posting group filter |
| NPS Vendor - Balance to Date | This report helps to inquire information about balance per vendor on the specific date. It shows all vendors that have open balance. | Vendor posting group filter |
| NPS Vendor - Detail Trial Balance | This report enlists all transactions by document type and date, with possibility to check amounts in two currencies. | Vendor posting group filter |
| NPS Vendor - Purchase List | The report pays attention to all the purchases within a certain time period | Vendor posting group filter |
| NPS Vendor - Trial Balance | This report helps to inquire information about balance per vendor on the specific date. It shows all vendors that have open balance. | Vendor posting group filter |
| NPS Vendor - Summary Aging Simp | This report shows the amounts due by period, for the selected vendor during the selected period. | Vendor posting group filter, extended vendors balances due up to over 360 days |
| NPS Trial Balance With Start Balance | This report shows Credit and Debit Balance, Net Charge and Net Charge Balance for each G/L Account, group and class of G/L Accounts on the specific date. | Added options and columns |
| Vendor - Detail Trial Bal. in Curr. and LVT | This report enlists all transactions by document type and date, providing possibility to check and analyse amounts in both local and foreign currencies. | |
| Customer - Detail Trial Bal. in Curr. and LVT | This report enlists all transactions by document type and date, providing possibility to check and analyse amounts in both local and foreign currencies. | |
| Commitment Analysis Summary | This report shows the analysis of Customers, Vendors, Bank Accounts, Employees, Fixed Assets distributed by G/L accounts. The report presents the following data: starting balance, debit amount, credit amount, not due and overdue amounts. | |
| Commitment Analysis | This report shows the analysis of Customers, Vendors, Bank Accounts, Employees, Fixed Assets distributed by G/L accounts. The report presents the following data: debit amount, credit amount, remaining amount and balance by document numbers. |
FAM - Fixed Assets Management
The following topics provide more information on how to use Fixed asset advanced functionality, to post, change and analyse detailed data on fixed assets through Business central.
In this section:
| Feature | Description | Release |
|---|---|---|
| FA history | Information on changes regarding tracking assignment/discharge of fixed assets by location, employee or customer. It also provides valuable report for review or print out and verification | |
| FA preparation posting type | It serves to companies needs to keep track on fixed assets that are purchased but not yet in use | |
| FA details | Detailed information source on fixed assets posted transactions and changes | |
| Set up depreciation on FA classes and subclasses | It makes it easier to fill in all necessary information regarding depreciation by only choosing the right class/subclass, instead of filling out each FA detail card separately |
NIA - Negative Inventory Adjustment Allowance
Negative Inventory Adjustment Allowance
NIA provides that any negative Item Quantity can not be posted on posting date, except in case if on Item Card is set differently (Option “No” on Prevent Negative Inventory on Inventory Tab). This practically means that if a certain Item is on stock today but yesterday was not, the program shows an error when you try to post on that date when that Item was not on stock.
Inventory Setup
Before posting any Item Ledger Entries there should be a setup which defines how to control negative inventory posting.
- Open Inventory Setup.
- Set field Prevent Negative Inventory on General Tab to enable standard functionality to prevent negative inventory.
Item Card
- Open Item Card.
- Choose Prevent Negative Inventory on Inventory Tab from options:
- Default (Yes): option is used if you want always to prevent negative posting on the Item.
- Yes: option is used if you want always to prevent negative posting on the Item.
- No: option is used if you don't want to prevent negative posting on the Item.
Post Sales Order
Sales Order is used to post items to customers. When posting Sales Order program checks if there is any inventory for Item, on a certain location and on posting date.
- Open Sales Order and create a new document.
- Enter Customer No. and all other mandatory data.
- Choose Item No.
- Choose Location Code and other mandatory data
- Post Sales Order by choosing Posting->Post
The program shows error and prevents the negative posting of Item on Location in case there is no Inventory on Location on specified posting date.
Post Sales Invoice
Sales Invoice is used to post items to customers. When posting Sales Invoice program checks if there is any inventory for Item and on a certain location on specified posting date.
- Open the Sales Invoice and create a new document.
- Enter Customer No. and all other mandatory data.
- Choose Item No.
- Choose Location Code
- Post Sales Invoice by choosing Posting->Post.
The program shows error and prevents the negative posting of Item on Location in case there is no Inventory on Location on specified posting date.
Post Item Journal
Item Journal is used to post items to and from locations. When posting Item Journal program checks if there is any inventory for Item and on a certain location on posting date.
- Open Item Journal and create a new line.
- Enter Document No.
- Choose Item No.
- Choose Entry Type Negative Adjmt. or Sale.
- Choose Location Code
- Post Journal by choosing Actions->Posting->Post.
The program shows error and prevents the negative posting of Item on Location in case there is no Inventory on Location on specified posting date.
DCA - Debit Credit Amounts
COM - Compensation
This functionality is created for planning, contracting and posting obligations fall due by compensating Customers and Vendors, creating related document called Compensation proposal .
Pre-requisites for using this functionality is to set contacts relations between linked Customers and Vendors, which are business partners a company has payables and receivables at the same time.
There are fields, Balance(DVT) as a vendor and Balance(DVT) as a customer on vendors and customers contact cards. According to these amounts, the system recognizes total amount of payables/receivables with certain partner and can create Compensation proposal.
How to create Compensation overview:
Before Compensation proposal is created, you can find Vendors and Customers that have condition for compensation and look for the amount for compensation. This can be done through report called Customer/Vendor preview , with possibility to filter Customer/Vendor.
- Go to Search window and type Customer/Vendor preview
- Select No. of contact from Filter-Contact list, if you want overview balances for one or a few partners.
- You can Filter totals by Date filter, Salesperson filter, Sales cycle filter etc.
| No . | Name | Cust.balance | Vend.balance | Difference | Possible compensation amount |
|---|---|---|---|---|---|
| C0050 | Dynamic trade doo | 12000 | 22000 | -10000 | 12000 |
How to create Compensation proposal :
With the list of partners eligible for compensation, next step is to create Compensation proposal. Compensation proposal can be printed as a separate report to send to business partner for confirmation.
- Go to Payment journal – Process – Suggest compensations . New page will open, it is necessary to set up fields for Posting date, Document number and Description. It is possible to select certain Vendor/Customer, simply enter Ven./Cust. No.
- Depending on open entries for all or a few Vendors/Customers and payables/receivables due date, the system will create journal lines. You can arrange the journal, having some lines deleted, if not desired to make a compensation for all the payment journal lines.
- You can check Applies to doc. No. and Applies to doc. Due date. These fields are editable, in case you want to choose a different invoice to apply.
- Correct amounts to be applied are related to open Customer/Vendor entries. Payment journal balance is to be 0.
- Then go to Report – Compensation proposal to print the report in order to forward it to your business partner for confirmation.
How to post compensation:
If your business partner confirms, the final step is to post compensation journal lines from Payment journal.
New Customer/Vendor entries will occur after Payment journal is posted. As a result, original invoices are applied, having payables and receivables settled.
VAT - VAT Management
VAT is a general consumption tax that is calculated and paid. The Vat in RS is 10% (general percentage) and 20% (special percentage). VAT is calculated for all taxpayers. It is calculated once in a month or once every three months. When VAT will be calculated depends on which category you are. After you finish the VAT calculation, you need to send it to the tax administration. The tax administration controls your VAT, because you will send it.
What is VAT in Business Central and how can we calculate it easily and precisely? It is the right time to find out.
For your VAT calculation to be easier to work with, you should define VAT Identifiers. The VAT Identifiers will be set on VAT Posting Setup. Documents entered and documents created in Business Central will have appropriate VAT identifiers. The VAT Identifiers will help you to define the VAT Book. All VAT books together are a VAT calculation.
| Feature | Description | Release |
|---|---|---|
| VAT book groups | Define the lines of a VAT reporting form | |
| VAT identifiers | Describes the posting of VAT Identifier when posting VAT entries for a certain combination of Posting Group | |
| Postponed VAT | VAT amount is to be suspended as it is not possible to settle it at a given time. . | |
| Reverse Charge VAT | It is calculated on some services from abroad. |
RVE - Reverse
With this functionality, companies can use specific document called Reverse order , to assign any item to employees, customers or vendors.
It goes with an option for print out shipments and receipts of reverse transfers and also with possibility to check reverse assignment review showing active reverse orders for certain period.
In this section:
| Feature | Description | Release |
|---|---|---|
| Reverse orders | Offers possibility for posting and efficient tracking items assigned to either employees, customers or vendors | |
| Inventory reverse preview | It is a report that provides valuable information on when/to whom are items given for use |
MNM - Minor assets management
Minor assets allows the transfer into use after purchasing of minor assets. When put into use, it can then be issued in reverse. To perform entries for minor inventory in use, it's necessary to set up Item Journal Template. Create a new form, and on that form, you will define:
- No. Series
- Source Code
- Subtype

The next step is to set up the Batches.

Adjust the General Posting Group and Location Code for Minor Assets in the Item Journal Batches, and finally, enter the Subtype at the bottom of the table.

General Posting Setup.


When you want to transfer minor assets into use, this is done through the Item Journal.

Select the created template from the list, as shown in the picture.

In the Item Journal, Enter Type - Negative Adjustment is entered, and Item No, Location Code, and Quantity are entered.

Item Ledger Entries Preview.

DPS - Double Posting
This functionality is developed for posting transactions of class 9 – calculation of manufacturing cost of goods sold.
It is possible to enter these changes through Double posting settings on Account card using two different ways:
- Direct double posting on account
- Double posting through dimension group values
In this section:
| Feature | Description | Release |
|---|---|---|
| Direct double posting on account | This setting is used in case we want to directly post and create two additional class 9 entries, with each transaction posting, for the accounts pre-defined to have this ability | |
| Double posting through dimension group values | Functionality used if needed to set and post double-posting transactions through group dimension values |
AXR - Advanced Exchange Rates
Within this functionality, users are allowed to select a separate account for each posting group of customers/vendors, on which the realized and unrealized exchange rate differences will be posted. The need for this functionality arose from the accounting regulations which require that exchange rate differences from relations with Parent, Dependant and related legal entities be recorded in different accounts (about to accounts set in currencies).
An additional advantage that the processing includes is that the general ledger items resulting from the processing of exchange rate differences are recorded by the number of sources (number of customers/vendors).
Before working with this functionality, it is necessary to enter the NBS exchange rate on the day when the processing is done:
- In quick search find Currencies
- Select the currency for which you want to enter the exchange rate
- Choose Process->Exch. Rates and enter the currency
Adjust Exchange Rates Setup
- In a quick search, type Adjust Exchange Rates Setup
- Choose New to add a new line
- Enter posting groups, currency and corresponding accounts of realized / unrealized, gains/losses exchange rate differences

Lines on this list can be edited or deleted with the appropriate actions. Based on these settings when processing exchange rate, these combinations will be posted to the corresponding accounts.
After these settings, the Adjust Exchange Rates functionality can be started:
- In a quick search, type Adjust Exchange Rates
- Enter Starting/Ending Date for which exchange rate differences are to be calculated.
- Enter other related data
- Click OK to start the calculation and posting
PGI - Inventory (Journal) Posting Groups
Items General business posting groups
This functionality allows to set gen. bus. posting group on locations that will copy to all item journal lines.
It can be done for different actions with items – transfer, assembly order, physical inventory, opening balance, revaluation, reclassification.
I How to set gen. bus. posting group on Item journal batch
This functionality regarding inventories enhancements allows to set up gen. bus. posting groups on Item journal batches that will apply to all item journal lines.
- Find Item journal templates in Quick search engine
- Choose template for adjustments and on Navigate tab, select Journal batches
- Choose Gen. bus. posting group on Item journal batch that will be used as a default value with data in journal lines
II Assembly orders
We use assembly order to create items that are a combination of more items/resources and needed to be sold or placed in location as assembly on stock. In order to use this option, it is necessary to create an assembly item and adjust assembly setup.
How to create assembly item:
- Go to items and create a new one. Choose inventory posting group
- On Replenishment tab find Assembly section, and choose Assembly BOM – “yes”
- New page will open. Add lines with items/resources to form your assembly item. Here you will define item tracking lines if needed
Adjust Assembly setup
- Go to gen. business posting groups and define one for Assembly orders
- Find Assembly set up, General tab and on field Gen. bus. posting group select posting group for assembly orders that is previously created
- Numbering tab requires attention, meaning to select new no. series Assembly order nos., Posted assembly order nos. There are additional two fields for Assembly quote nos. and Blanket assembly order nos., if needed to use and adjust
Here you will find additional assembly setup options such as:
- Stockout warning : it specifies whether stock availability warning will appear during sales order entry
- Default location for orders: specifies in which location assembly order are created by default
- Copy component dimensions from: specifies if dimension is to be copied from item/resource card or Order header
How to create and post Assembly order for stock
- Find Assembly orders and create New
- Choose item assembly and quantity
- Enter items in Assembly order lines
- Check Posting tab, it should have pre-defined gen. business posting group for Assemblies
- Post assembly order. Ledger entries for items/resources spent will show as Assembly consumption entry types, created assembly as Assembly output
How to create assembly order within the Sales order
You can create assembly order within Sales order document. Prior to this it is only necessary to have item defined as assembly, as shown in one of the previous sections.
- Open new sales order
- Fill in standard General tab fields
- In Sales order lines, choose your assembly item and go to column Quantity to assembly to order . Fill in with the number of quantity and then on drill down to record, new page will open. On the page, define item/resource lines to compose this assembly order
- By posting the sales order, in the background, assembly order is created and posted; to check this, go to posted assembly orders, or check item ledger entries
- Item ledger entries will be posted with Assembly gen. bus. Posting group, as defined in Assembly setup
III Transfer orders
Gen. bus. Posting group is to be created for transfer orders. It can be set up on Location card.
- Go to Location. Create In-transit location and setup field Gen. bus. Posting group for “transfers”
- Go to Transfer routes and define Transfer routes matrix
- Set gen. business group for transfers in items journal batch for this activity
How to create and post Transfer orders
- Search for transfer orders and create a new order
- Set header fields – Transfer from, transfer to location
- In-transit code should automatically appear, according to previously adjusted transfer routes
- With previous steps, field Gen. bus. Posting group will automatically fill in, since it is modified within the location for transfer
- Fill in Transfer order lines, post the shipment and receipt. Two documents will be created: Transfer order shipment and Transfer order receipt
- Item ledger entries will be posted with Transfer gen. bus. posting group, as defined in header of the transfer order document
DCT - Document Subtypes
Document subtypes provide possibility to post different types of transactions regardless of current settings on items, customers and vendors.
If any specific situation requires to set up new posting scheme (specific combination of posting groups and new G/L accounts), it can be achieved through this extension.
Companies can create document subtype for each business transaction, having at the same time a benefit of classifying transactions, sorting out and further use in internal analyses.
How to set up document subtypes:
There are Sales document subtypes and Purchase document subtypes. Instructions go for both Purchase and Sales documents, with remarks to eventual differences.
Go to search and type Sales document subtypes or Purchase document subtypes.
Click on New and set some of the standard fields:
- Document code – short code for the document type you want to create
- Document description – further details, description on your new document type
- General business posting group – in most of the cases it will be more convenient to create new gen. buss. post. group in order to set up new posting scheme
- VAT business posting group – create a new one if existing are not eligible to make combination
- Vendor/Customer posting groups – this option exists if there is a need to change vendor or customer posting group for the purpose of specific posting scheme
- Payment method – used to define payment method for our document type, it can be chosen as type of balance account (G/L account or Bank account)
- Check if it is for Internal correction – for Credit notes and Return orders
- Document type – it can be a choice between existing document types: offer, order, invoice, credit note, return order, blanket order.
This setting will affect on visibility within different document types. For instance, if our document subtype is for sales invoice, it will not be offered for selection in any other sales document.
- Posting number series – serves to create new posting no. series for your document type
- Receiving number series – if necessary, to define new receiving no. series
- Vendor/Customer name – all can be set up only for a certain customer/vendor
How to use document subtypes
Document subtypes can be created and used in various transactions such as:
- Sales/Purchase return
- Sales/Purchase prepayment
- Sales return for sales from the previous fiscal year
- Debit and credit notes
- Payment discounts and sales/purchase discounts
- Different expenses, such as gifts given to customers for presentation of products etc
Note : It is necessary to add relation between new posting no. series and no. series of the standard posting document type. For instance, if we want to create new sales invoice document subtype, and our new no. series is PNS and our standard no. series for sales invoice is PKF, we need to manage relation between those two.
This can be done through No. series administration – find your standard posting sales invoice no. series – go to Navigate – Relationships . Add new no. series code to relate to this standard one.
| Feature | Description | Release |
|---|---|---|
| Purchase document subtype | New purchase document subtype for returned goods may require updated VAT settings per specific regulations. | |
| Sales document subtype | New sales doc subtype for testing new machine with used items |
PPE - Prepayment
Prepayment functionality enables posting of prepayments and preparing related prepayment documents according to local regulations VAT requirements.
Therefore, this feature requires and correlates with certain VAT functionality extension options.
The rule says that Prepayment sales invoice must be posted if prepayment was received from customers and items were not shipped in a period that prepayment was received. Respectively, prepayment purchase invoice is received from a vendor in case that company has paid for items that were not received within the same period when the prepayment was.
In this section:
| Feature | Description | Release |
|---|---|---|
| Sales prepayments | Shows settings and functionality of sales prepayment posting, prepayment invoices and final invoice for items or services | |
| Purchase prepayments | Shows prepayment functionality regarding purchasing activities | |
| Prepayment credit memo | Information on how to reverse posted prepayment invoice |
ICA - Item Charge Assignment
Item Charge Assignment ICA is used to order certain items, dependent costs allocated according to certain criteria to those items.
The program can save the charge of the articles, e.g. transport or packaging - which can be added to ordered items.
Using this functionality, the cost of product purchase can be directly determined and analyzed.
By adding item charge (dependent purchase costs) to the order, costs can be allocated directly to the items.
Item Charge Assignment by Tariff Number
If a charge by Tariff number is used, the Tariff number must be defined.
- In the quick search, type Tariff Numbers and there you can enter the tariff numbers to be used:
| No. | Description | Rate % |
|---|---|---|
| 0210.19 | Komadi pilećeg mesa | 1,5 |
- After defining the tariff numbers, on the Item card enter the appropriate Tariff number for that item on the Cost & Posting tab.
On order/Invoice: Add a new shipping cost line for the newly created Order / Invoice.
- Select the option Charge (Item) in the field Type.
- Select in the field No. some Item charge
- Enter 1 in the field Quantity.
- Enter the Unit cost as well.
- Click the button Line->Related Information->Item Charge Assignment. Run the Item Charge->Suggest Item Charge Assignment by Tariff Number.
After that, the costs will be distributed among the items.
After selecting the close button, a window will appear asking "Purchase Line has multiple item charge assignments. Do you want to split line per assigned item charge?" If you select "Yes", the program will split the cost into as many lines as there are items with a tariff no with the corresponding amount, if you select "No" the cost will be in one line with the amount in full.
Breaking of dependent costs by dimensions When we have several items with different dimensions on one purchase order/invoice and need to be assigned dependent costs, functionality has been developed that automatically creates separate items for each dimension combination ID when posting dependent cost related to multiple receivers or delivery.
CSD - Cash Desk
Cash Desk operations include taking, keeping and issuing cash. Transactions cash in one company are done through the cash register . This functionality was developed due to the need to record cash transactions. Cash registers are based on the possibility of posting payment journals.
| Feature | Description | Release |
|---|---|---|
| Cash desk settings | Description of important steps to follow for completion of functionality setup | |
| Cash Receipt List | It is the process of opening journal in order to make the posting | |
| Cash Withdrawal List | It is the process of closing journal in order to make the posting | |
| Correction Select Lines and Reverse | It is the process of correction select lines or cash order reverse | |
| Closed and Post Cash Report | It is the process closed and posting cash report |
IFR - Item - FA Reclassification
This functionality was developed due to the need to record transactions related to fixed assets and items. Functionality was developed due to the need to put a certain item into use as fixed asset and that the system maintains the connection of these transactions through adjustment item cost job.
How to set up Reclassification: The path is as follows:
- Type in search Item FA Reclass. Setup
Setup is done in table Reclass items to FA setup. It`s required to set No. series for documents, as well as posting groups, fixed assets posting type and balance account number for item and fixed asset. After that it’s required to enter source code for Reclass from FA to Item and vice versa.
How to use Reclassification:
| Feature | Description |
|---|---|
| Item to FA Reclassification | How to use Item to FA Reclassification |
| FA to Item Reclassification | How to use FA to Item Reclassification |
DIM - Dimension Management
Modify dimensions on posted entries If some dimension on a document has been posted mistakenly, this functionality enables changing posted dimensions on posted entries.
- Go to General Ledger Entries and search entry that should be changed.
- Choose Actions->Modify dimensions
- Enter the new dimension
- Press OK button to apply entered changes
Now on that G/L entry there must be a new dimension which was entered.
If G/L entry, which is modified, has an account schedule (costumer/vendor entries, Fixed Assets entries, etc), modified dimension will be registered on that entries automatically.
YEP - Yea-End Process
All No. Series that we have created and that we use for easier tracking of all business changes and processes should be reopened for the next year.
| Feature | Description | Release |
|---|---|---|
| Create No. Series Line | When opening a new business year in BC, a new No. Series must be created that will be used for the following year. |
Potrebna vam je pomoć?