NBS web service integration
Service setup
Before this extension can be activated, the following preconditions must be met:
-
The company must be registered in the National Bank of Serbia web system.
-
A digital certificate must be installed.
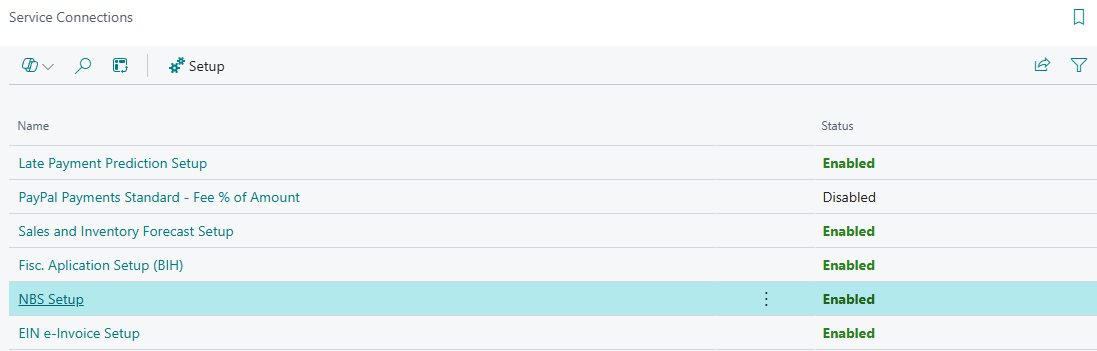
You can access the NBS web services connection through Service Connections in Business Central.
In the search bar, type Service Connections, open the page, and then select NBS Setup to configure the service.
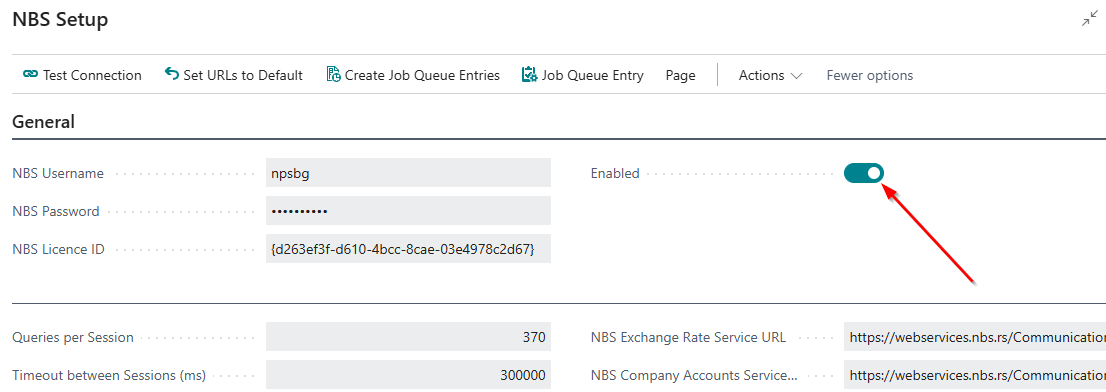
On the General tab on the NBS Setup page, it is mandatory to enter the following information:
NBS Username – provided by NBS
NBS Password – provided by NBS
NBS License ID – provided by NBS
After entering the NBS Username, NBS Password, and NBS License ID, run the Set URLs to Default action on the NBS Setup page.
This action enables the system to automatically retrieve all necessary URLs required for further work with the NBS web service

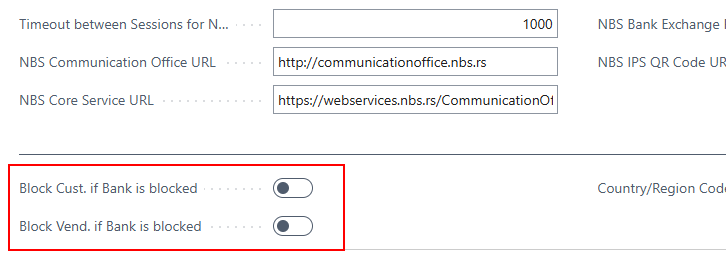
On the NBS Setup page, the options Block Customer if Bank is Blocked and/or Block Vendor if Bank is Blocked allow a customer or vendor who has been blocked by the National Bank of Serbia to be automatically blocked in Business Central as well. This way, you have timely information about any initiated forced collection (account blockage) and additional control over further business operations.
Note: Blocking functions can be customized if you want to continue working with a blocked customer or vendor. This is configured directly on the customer/vendor card, under the General section. The Blocked option on the customer and vendor card contains a dropdown menu where you can select what to block (shipment, invoice, all).
Enable the NBS service
To enable the service with the National Bank of Serbia, after retrieving the URLs and entering the username, password, and license ID, you need to check the Enabled option – on the NBS Setup page. After that, you can proceed with the next steps to retrieve data from the National Bank of Serbia.
How to apply the NBS functionality
The next step is to execute the actions covered by the NBS functionalities.
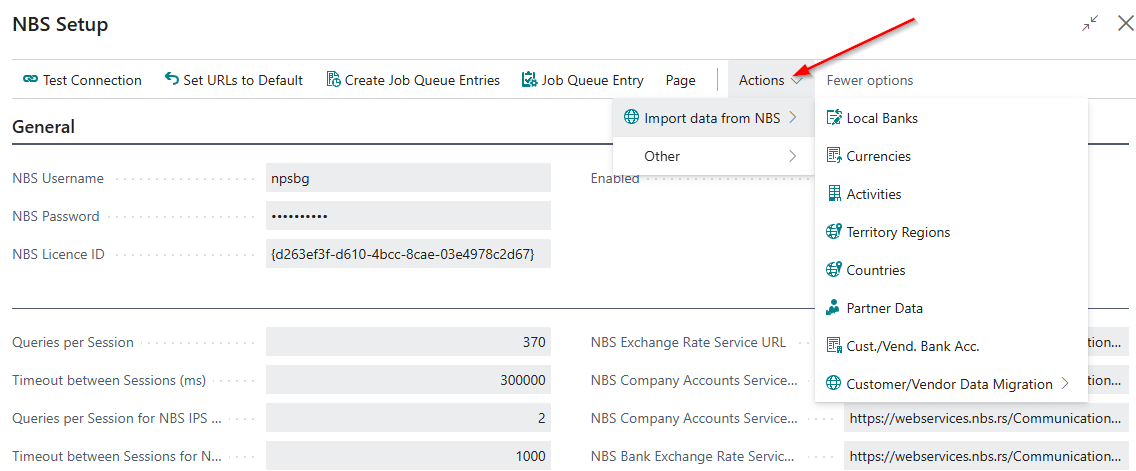
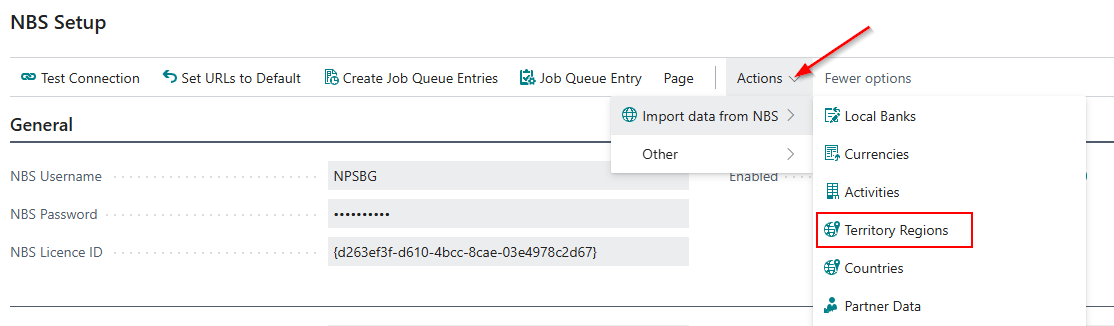
On the NBS Setup page, under the Actions section, by selecting the Import data from NBS action, you will get a list of available data retrieval actions, which includes:
-
Local banks
-
Currencies
-
Activitis
-
Territory regions
-
Countries
-
Partner data
-
Customer/Vendro bank account.
-
Customer/vendor data migration
Action Local banks
The Local Banks action imports all information about state-registered banks – name, address, contact details, and website – providing a complete database of all local banks.
The local banks directory is necessary for creating local bank currencies, as well as when setting up exchange rates from a local bank.
Regular updating of the local banks directory and the current accounts of customers and vendors is a prerequisite for the proper functioning of features such as payment transactions, vendor payment proposals, and statement imports.
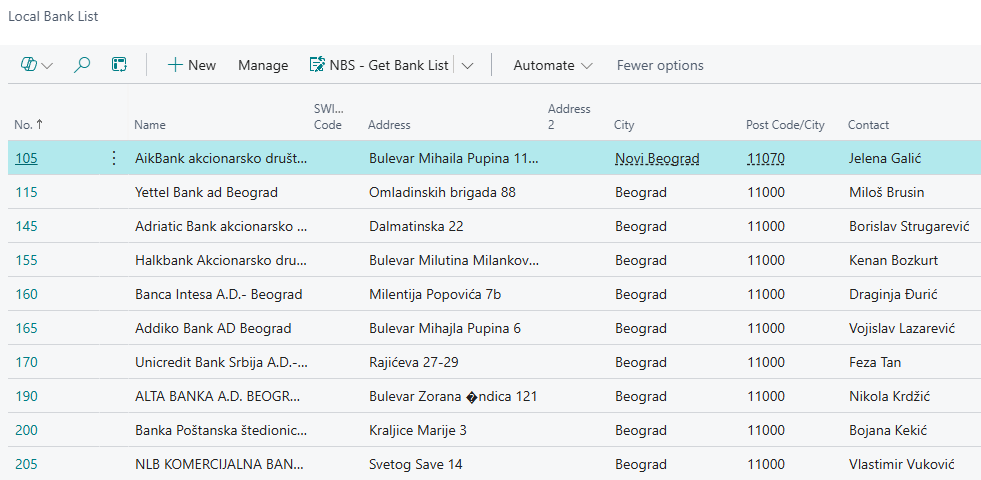
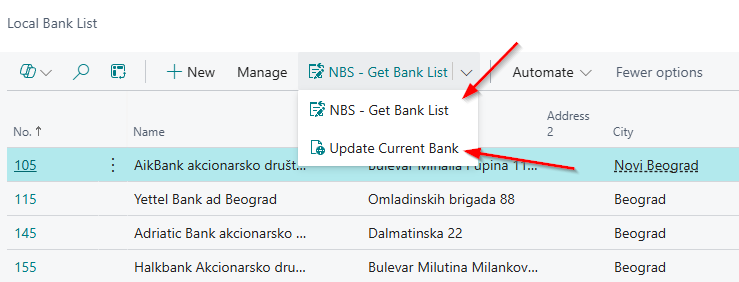
After retrieving the Local Banks data, if you enter Local Banks in the Business Central search, you will get a list of the imported local banks. The local banks list can also be updated and re-imported from the Local Banks page by running the NBS – Get Bank list action and the Update Current bank action.
Action Currencies
The Currencies action enables the import of all currencies into Business Central. When you retrieve currencies from the NBS Setup page and obtain the complete list, you can also access the same list through the Business Central search by entering Currencies.
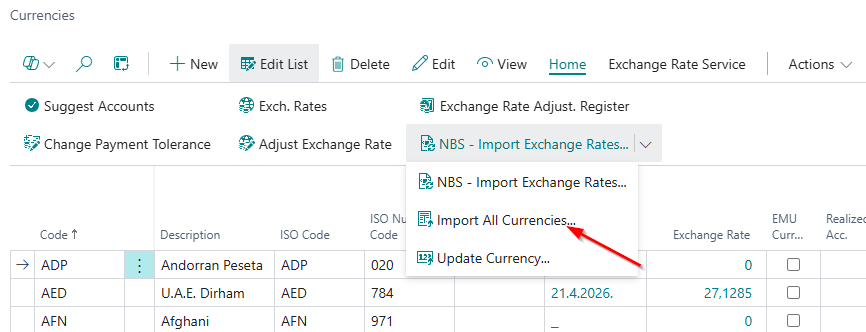
Currencies can also be retrieved directly from the Currencies page by selecting Home → Import All Currencies. Use this option if you have not previously imported the list from the NBS Setup page.
Importing currencies significantly reduces the risk of system errors. One of the key requirements for proper functionality is that currency codes must be entered in the exact same format as on the website of the National Bank of Serbia.
For example, the correct code for the euro is EUR. If EURO is entered manually in the code field, the system will not be able to retrieve the corresponding exchange rate, as such a designation does not exist on the NBS website.
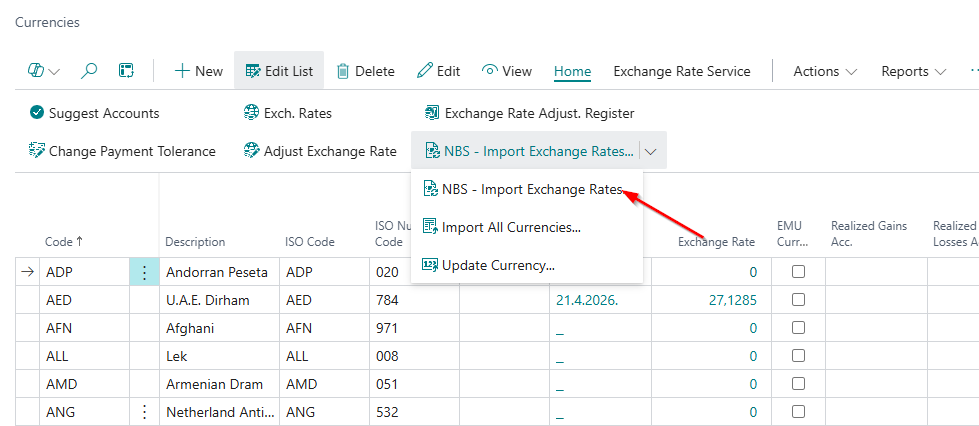
Action NBS – Import Exchange Rate from NBS
The NBS – Import Exchange Rate from NBS action, located on the Currencies page, enables the system to pull all exchange rates from the NBS website for the currencies available in your list.
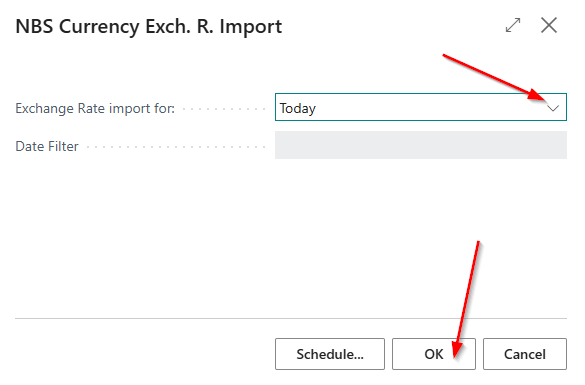
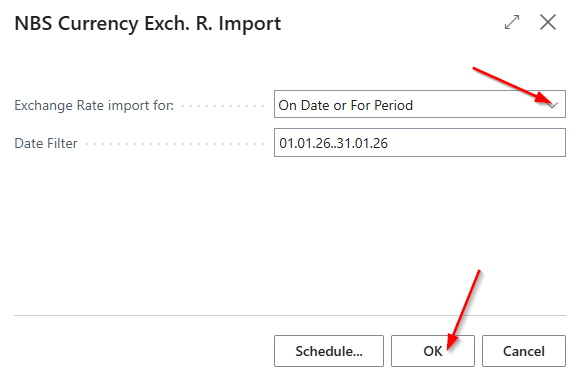
After running the NBS – Import Exchange Rate from NBS action, a new window appears where the user selects whether to import exchange rate lists:
-
For today
-
For a specific date or period
In the Date Filter field, enter the desired dates for processing. After confirming by clicking OK, the currency exchange rates will be imported and updated in Business Central.
Creating a Currency for Importing NBS Effective or Currency
If you have a vendor who requires transactions to be calculated based on the effective rate of a specific local bank, i.e., the bank where they hold a current account, it is necessary to create the exchange rate for that local bank.
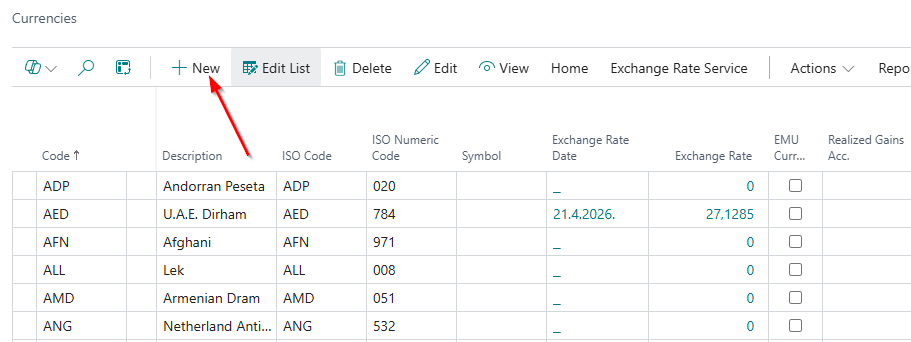
To run the function and set the parameters, open the Currencies page in Business Central (accessible via the Business Central search). Then, on the Currencies page, click the New action to create a new currency card.
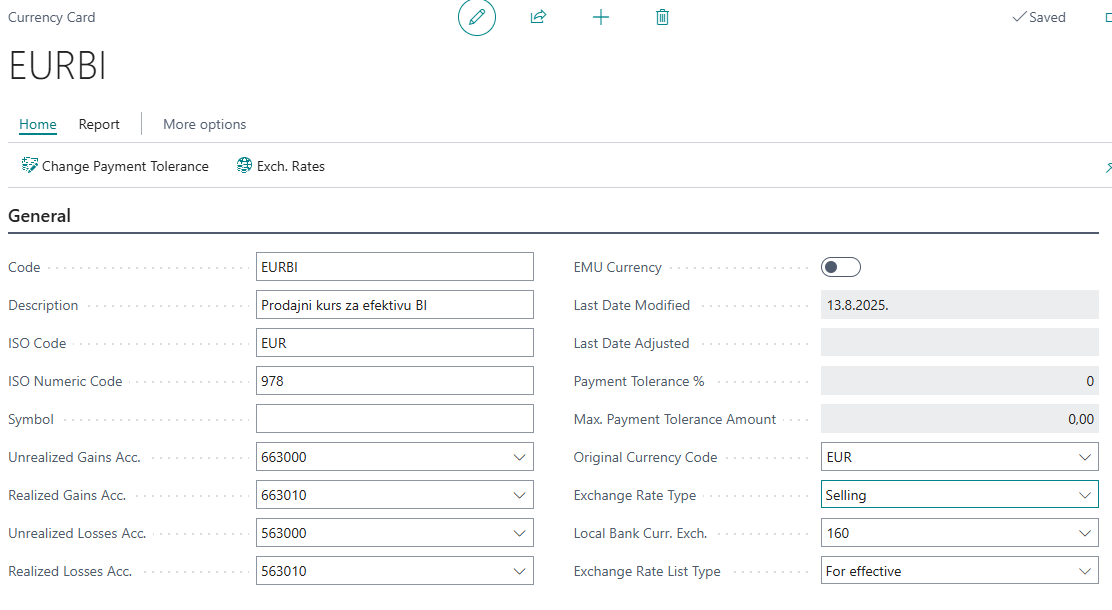
The data to be filled in on the Currency card, under the General tab, are:
-
Code: depends on the currency (e.g., EUR, USD); it is recommended that the name includes the currency and the bank initials.
-
Description: a short description of the currency.
-
ISO Code: the code defined according to international standards (EUR, USD, etc.).
-
ISO Numeric Code: defined in the country and territory directory according to international standards.
-
Original Currency Code: e.g., EUR, USD.
-
Account: enter the account for positive and negative exchange rate differences.
-
Rate Type: from the dropdown menu, select whether you want values based on the selling or buying rate.
-
Bank Code for Currency Rate: the first three digits represent the fixed bank identification number, which the system uses to determine which bank the processing is performed with.
-
Exchange Rate List Type: select Effective only.
Note: Exchange Rate List Type – the selling and buying rates of commercial banks apply only to effective rates and cannot be used for currency. For NBS rates, it is possible to configure the system to retrieve both buying and selling rates for foreign exchange and effective rates, according to your needs.
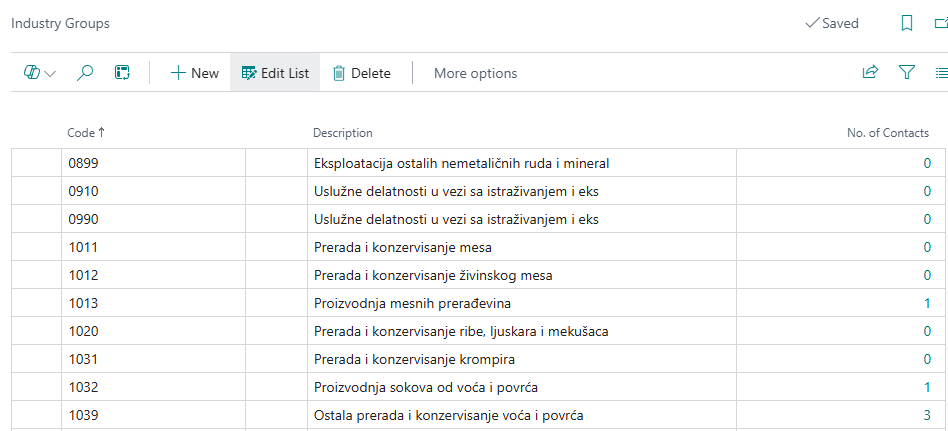
Action Activities
The Activities action is located on the NBS Setup page → Actions → Import Data from NBS → Activities. After running this action, you will receive the downloaded Activities code list.

In Business Central, Activities represent classifications used for categorizing business partners. The Activity data is automatically transferred to the business partner when data is imported from the NBS.
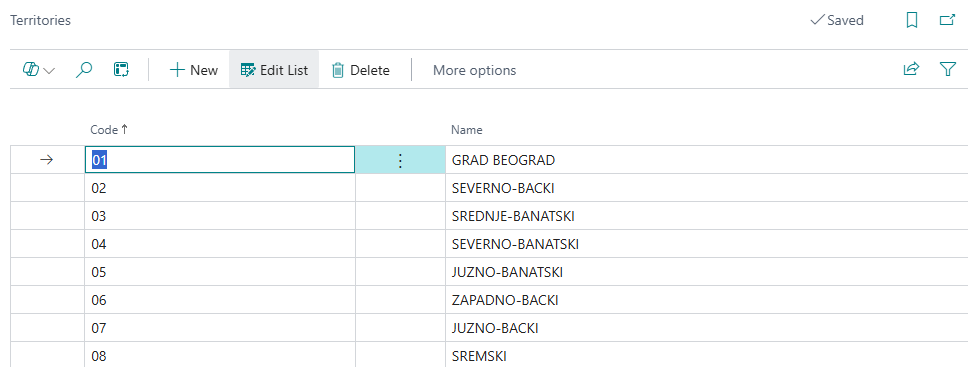
Action Territory regions
The Territory regions action is located on the NBS Setup page → Actions → Import Data from NBS → Territory regions. After running this action, you will receive the downloaded Territory regions code list.
In Business Central, Territory regions in Business Central represent geographical areas used for categorizing business partners. The Territory regions data is automatically transferred to the business partner when data is imported from the NBS.
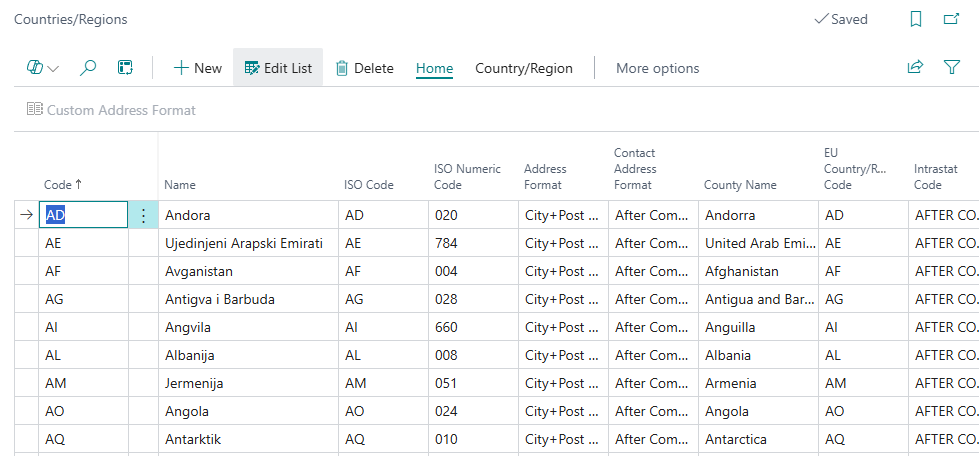
Action Countries
The Countries action is located on the NBS Setup page → Actions → Import Data from NBS → Countries. After running this action, you will receive the downloaded Countries code list.
In Business Central, Countries is a page that contains the country code list based on ISO standards. Each country has its own ISO code, which enables standardized coding of business partners and sales and purchase transactions. By using ISO codes, data consistency within the system is ensured, as well as easier integration with other applications.
Action Partner Data
In order to avoid errors when entering Partner Data (customers and vendors), a function is available that allows retrieving data from the NBS server.
To use this function, it is mandatory to enter the registration number or VAT number on the contact card. In this way, accurate data – name, address, postal code, city, registration number, and VAT number – is automatically obtained, which saves time during data entry and facilitates data verification.
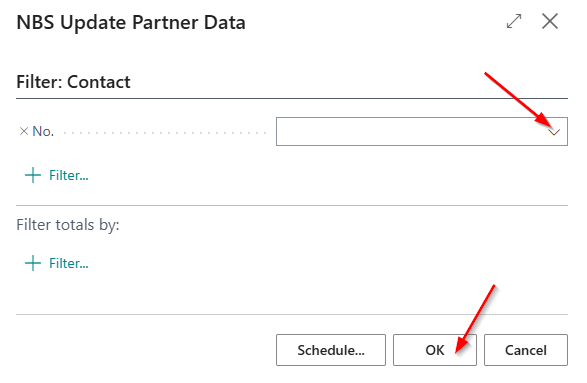
- The Partner Data action is located on the NBS Setup page → Actions → Import Data from NBS → Partner Data. After running this action, a data entry window will open:
-
Contact Filter – in this field, you can select a contact number from the drop-down list if you want to retrieve data for only one contact. By clicking OK, the data will be imported from the NBS.
-
If the Contact Filter field is left blank, the system will retrieve data for all contacts that have a VAT number or registration number entered. By clicking OK, the data will be imported from the NBS.
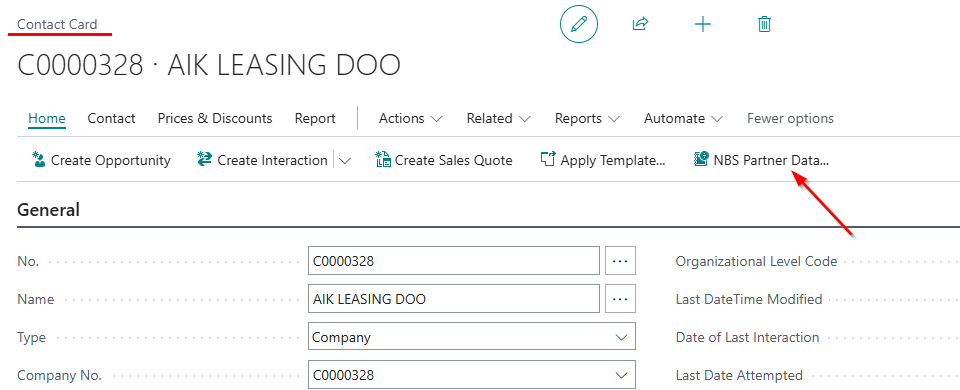
- The Business Partner Data action is available on the Contact card, as well as on the Customer and Vendor cards. This function enables retrieving data from the NBS for an individual contact, customer, or vendor. In this way, when entering a new contact or business partner, the data can be automatically retrieved and populated directly from the NBS, reducing the possibility of errors and speeding up the data entry process.
Note: If neither of these two data fields (registration number and VAT number) is entered on the Contact, Customer, or Vendor card, Business Central will display an error message and the data retrieval will not be possible.
Create Contact from NBS action on the Contact page
You can access the Contacts page by searching for Contacts in Business Central. On this page, you can view existing contacts or create a new one.
On the Contacts page, select Home → NBS Partner Data → Create Contact from NBS. By running the Create Contact from NBS action, a new page opens for entering the VAT number or registration number.


After entering the VAT number or registration number, a new contact is created in Business Central with data retrieved from the NBS service, and the contact card automatically opens for the user to enter any additional information if needed.
By clicking OK, the partner data is updated, while selecting Cancel will discard the data.
Action Customer/Vendor bank accounts
Importing and updating bank accounts can be done in two ways:
- From the NBS Setup page: By running Actions → Import Data from NBS → Customer/Vendor Bank Accounts, a window opens for entering additional parameters. Here, you can choose whether to import data only for customers, only for vendors, or for both, by selecting the appropriate option on the page. For the filters Customer Posting Group and Vendor Posting Group, which are also selected on the page, it is recommended to process only domestic partners, as foreign customers and vendors are not registered legal entities on the NBS website.
After selecting the appropriate parameters, clicking OK will retrieve or update the bank accounts of the selected customers and vendors.
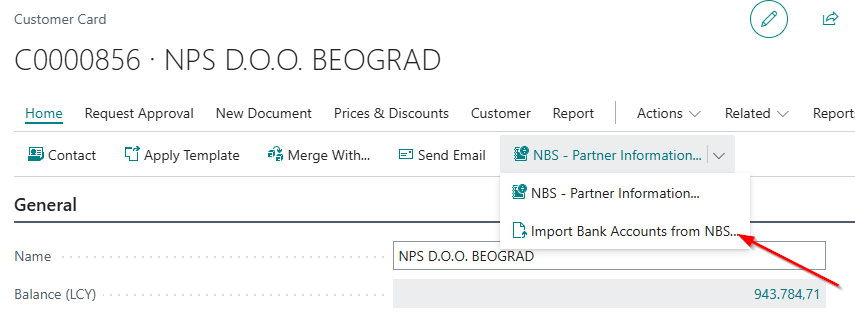
- From the Customer or Vendor card: By running Home → Import Bank Accounts from NBS, the system import bank accounts exclusively for the customer or vendor whose card the action is run from.
Customer/Vendor Data Migration
The Create Business Partners action enables two interconnected actions that facilitate quick data entry:
- Download Excel template
- Customer/Vendor from Excel
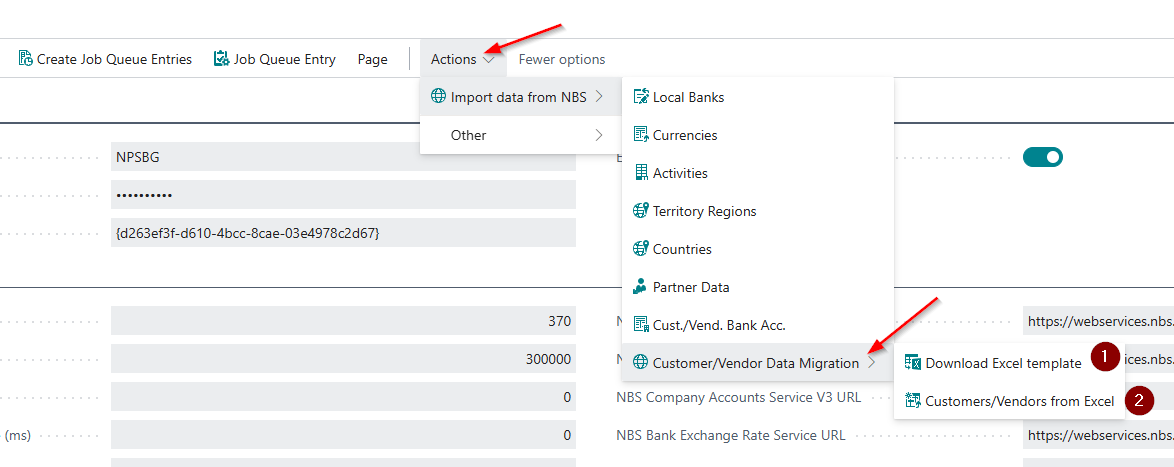
1.Download Excel template - The Excel file contains all the important data required to create a contact card (customer or vendor).
!
The following fields need to be filled in:
-
VAT Number
-
Registration Number
-
Customer Templates
-
Vendor Templates
-
Old Customer Number – if you are transferring data from previous software
-
Old Customer Name – if you are transferring data from previous software
-
Old Vendor Number – if you are transferring data from previous software
-
Old Vendor Name – if you are transferring data from previous software
The mandatory fields that must be filled in the downloaded Excel template are VAT Number or Registration Number, as well as Customer Templates and Vendor Templates. If these fields are not completed, the contact, customer, and vendor will not be created.
Other fields in the downloaded Excel template can be filled in as needed, depending on which additional data you require.
2.Customer/Vendor from Excel - Running this action will import the data from the Excel template.
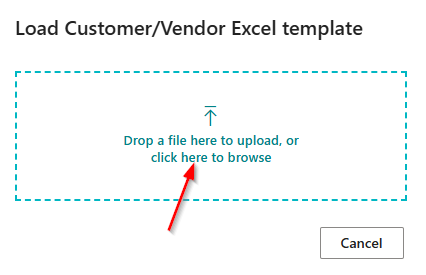
!
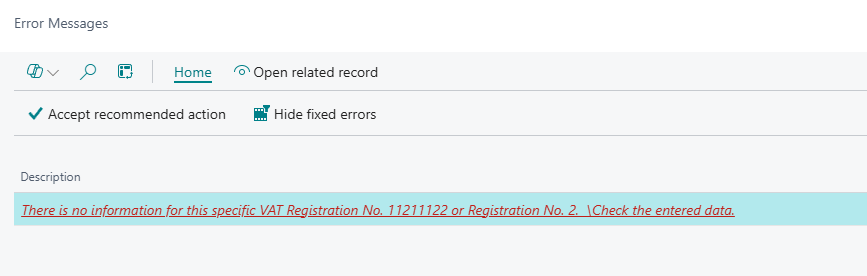
On the Request page, the Select option allows you to choose the Excel file you want to import. If any VAT number or registration number is invalid, the system will display an error message.
Action Create Job Queue Entries
After entering the specified parameters, the functionalities are ready for use. In the header of the NBS Setup page, by selecting the Create Job Queue Entries action, the system automatically creates a process that will retrieve the exchange rate from the NBS every day, including weekends. In this way, the exchange rate will be updated daily.
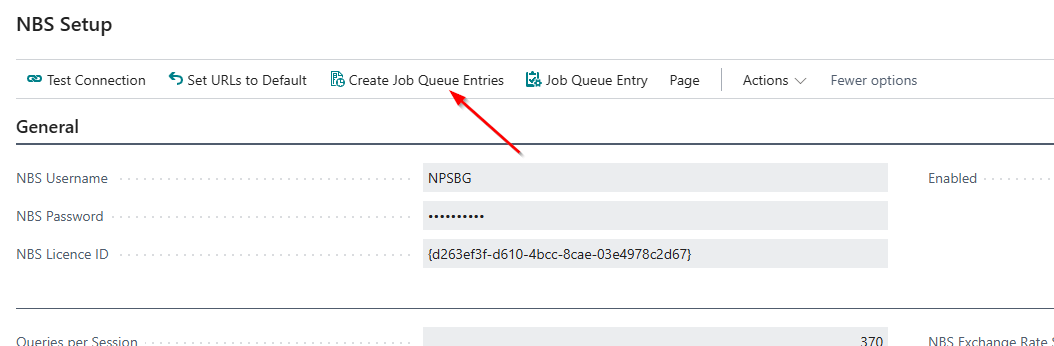
If any customer or vendor is blocked due to enforced collection, they will receive the status Blocked in Business Central (the status is visible on the customer/vendor card). This functionality enables monitoring of customer and vendor statuses in the NBS and helps reduce your business risk.
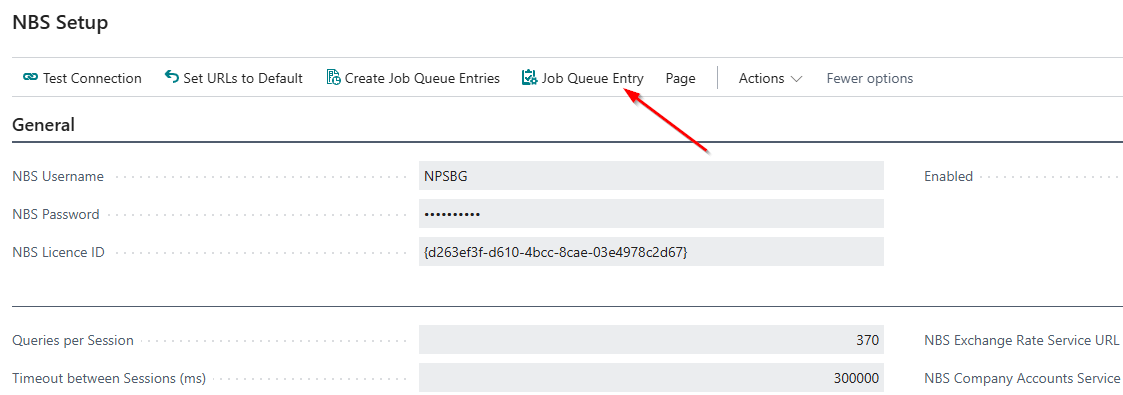
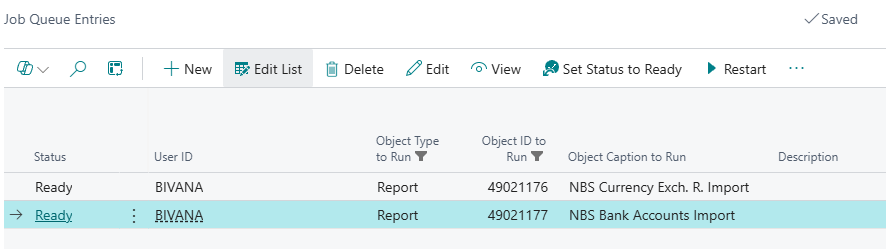
Job queue entry
After you create the Job Queue Entries using the Create Job Queue Entries action, you can view them by clicking on the Job Queue Entries action. A page with the created job queue entry lines will open.
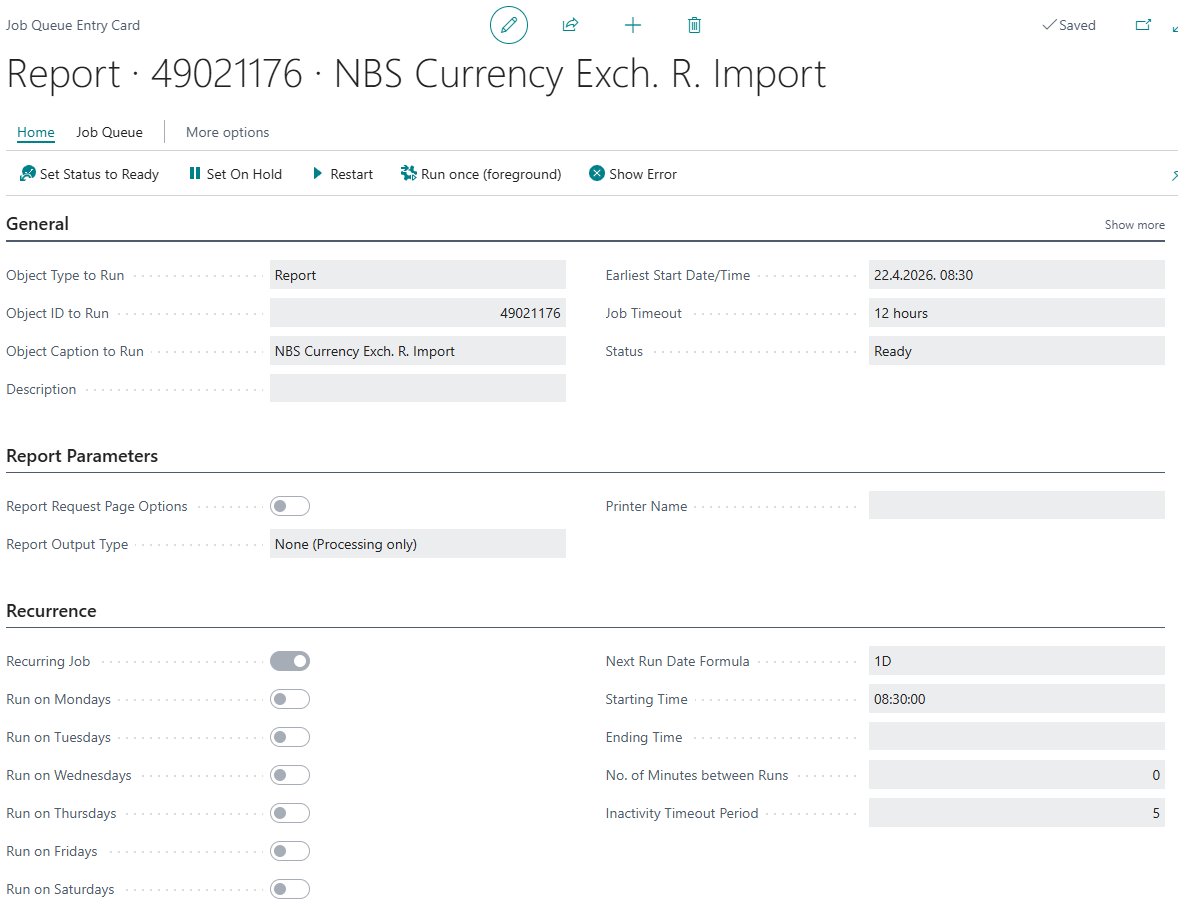
By clicking on a specific entry, the Job Queue Entry card will open. On this card, you can define the period, that is, the days on which the update will run.
Need more help?