EPE - Banking and Electronic Payment
Set up bank accounts
Bank account setup:
-
First, create the no. series by using Search and entering No. Series. On the No. Series list, choose the New action to create a new no. series. This enables each bank to have its own unique identifier (for example, B001, B002, B003…).
-
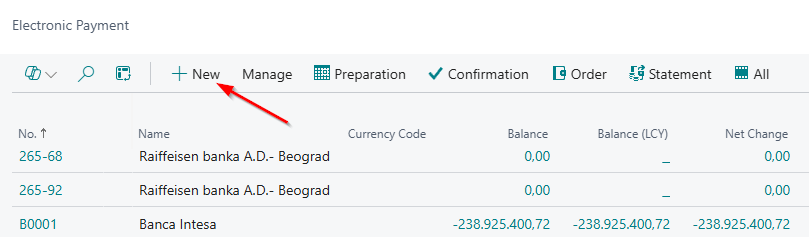
After the no. series is created, use Search to open Electronic Payment. On this page, choose the New action to open a blank Bank Account Card and enter the required data.
-
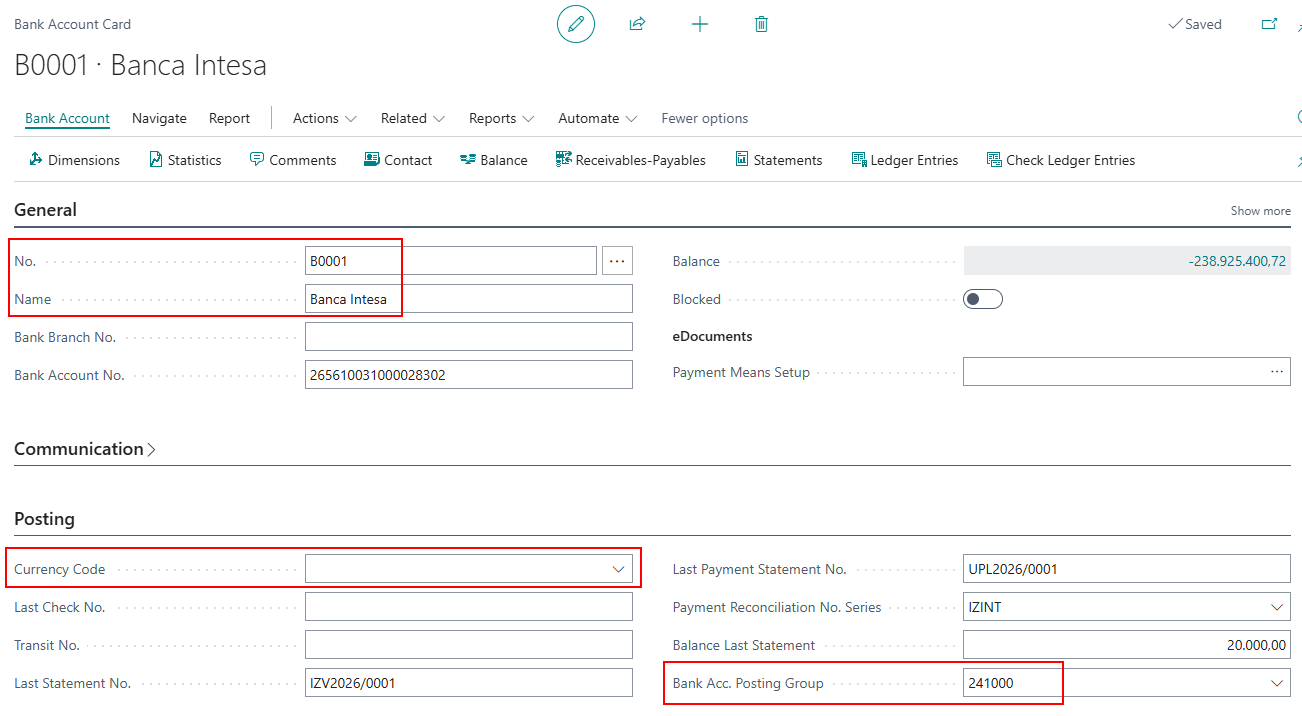
The mandatory fields on the Bank Account Card are: No., Name, Bank Acc. Posting Group, Currency (only if the account is not in LCY), and Bank Account No.
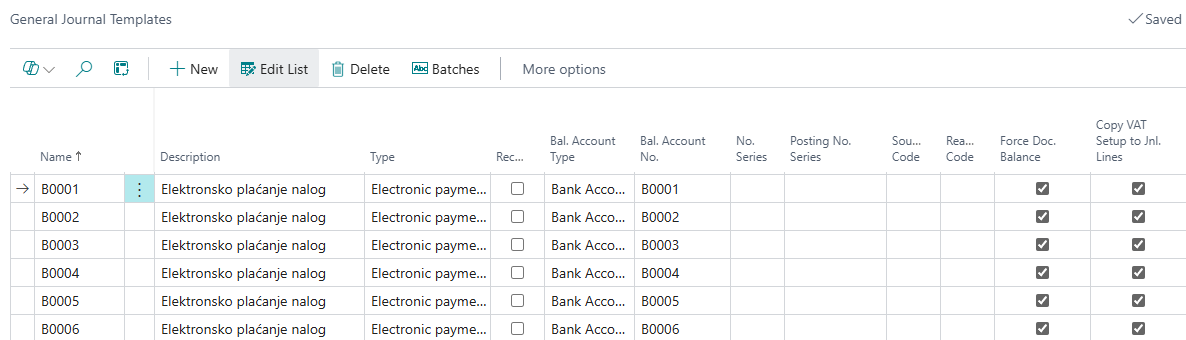
- It is necessary to create General Journal Templates for each bank.
General Journal Templates for Bank Accounts
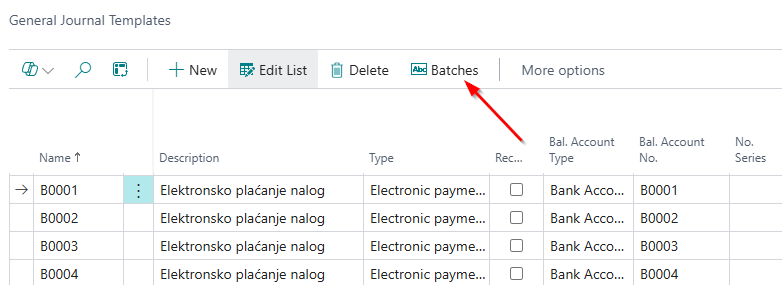
Once the journal is set up, you need to specify the XML file numbers used for data import and export for electronic payment applications (Office Banking and Halcom). This is configured on the General Journal Templates page by choosing the Batches action (General Journal Batches).
For each created bank, it is necessary to set up a separate journal template. To enable integration with electronic ayment applications, parameters related to journal templates must be properly configured.
In Business Central Search, enter General Journal Templates – this opens a page where you can define the following fields:
- Name – a short name or bank code
- Description – a brief description of the journal template
- Type – select Electronic Payment
- Bal. Account Type – select Bank Account
- Bal. Account No. – select the bank account you previously created
Make sure to select the following fields for the journal line on the page:
-
Force Doc. Balance – Specifies whether posted transactions in the journal must be balanced by document number and document type, in addition to balancing by document date, to ensure full consistency of postings.
-
Copy VAT Setup to Jnl. Lines – Specifies whether VAT calculation and account balancing should be applied to the journal line.
General Journal Batches for Bank Accounts
Once the journal is set up, you need to specify the XML file numbers used for data import and export for electronic payment applications (Office Banking and Halcom). This is configured on the General Journal Templates page by choosing the Batches action (General Journal Batches).

A new page opens where you can enter the following:
- Name – specifies the name of the journal.
- Description – enter a short description of the journal batch.
- Type – select Eletronic payment.
- Bal. Account Type – select Bank Account.
- Bal. Account No. - Specifies the account number to which the balancing entry is posted.
- No. Series – specify the number series that will be used to generate document numbers for posted entries.
- Export XMLPort ID – specifies the ID of the XMLPort used to export journal lines in a format adapted to the selected bank client.
- Import XMLPort ID – specifies the ID of the XMLPort used to import bank statements into electronic payment journal lines in a format adapted to the selected bank client.
For Halcom:
Export XMLPort ID – 49021177 Import XMLPort ID – 49021178
For Office Banking:
Export XMLPort ID – 49021175 Import XMLPort ID – 49021176
Credit Ref. Formula Code - Sales & Receivables Setup
Within Sales & Receivables Setup, it is necessary to define the field Default Credit Reference Formula Code.
Once this field is set, a credit reference will be automatically generated on the sales invoice. In this way, the customer receives a reference number on the invoice, which the system uses to identify the payment and match it with the corresponding invoice that has been paid.
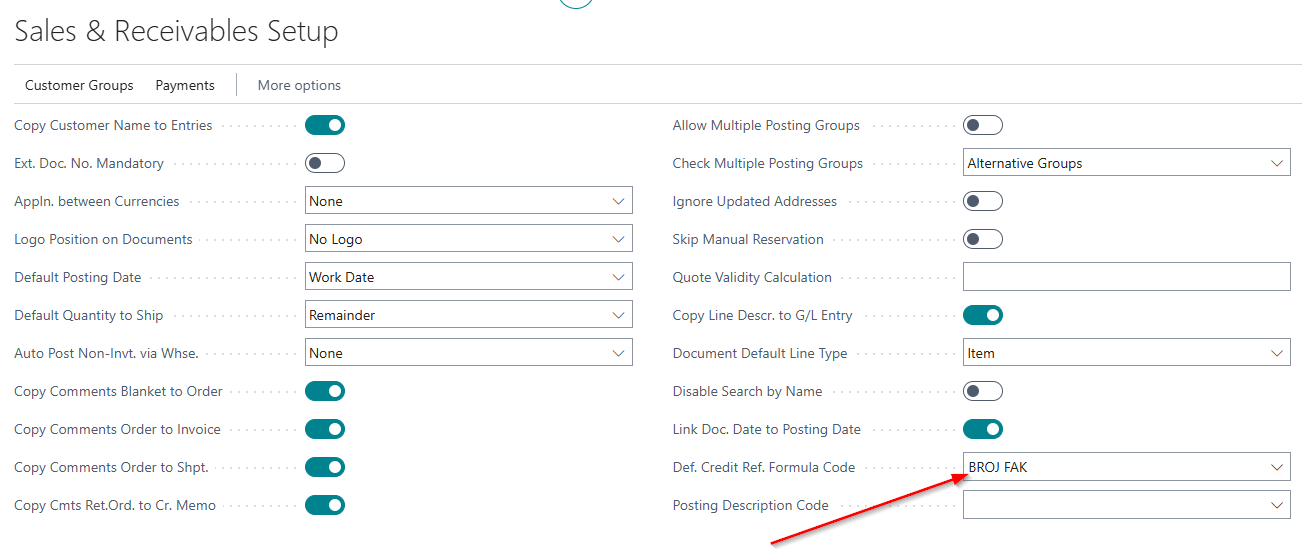
When we are on the Sales & Receivables Setup page and want to define the default credit reference formula code, clicking the drop-down arrow opens a list for further selection.
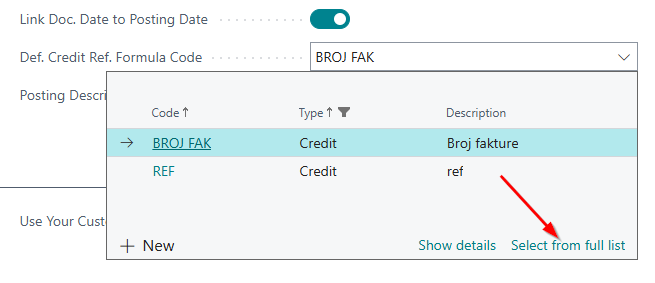
After that, choose the option Select from full list, as shown in the image.
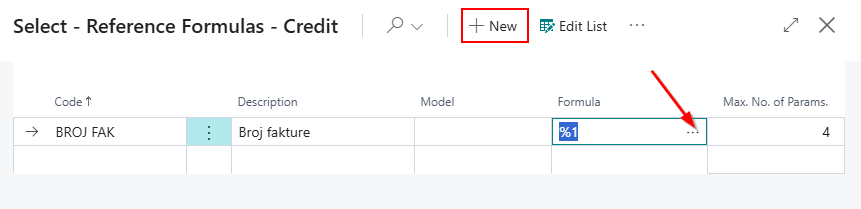
Click New. You need to assign a code, a description, and a formula (in our example, the name is Invoice Number).
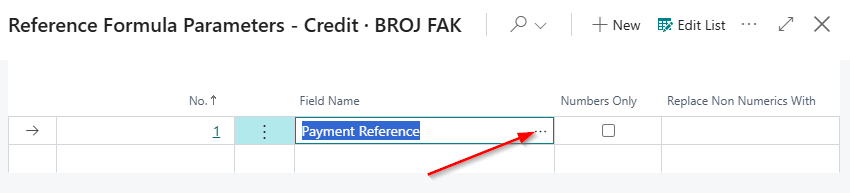
The formula is defined by clicking the ellipsis (three dots), then selecting the New option. A new window will open for further input.
According to our setup, the credit reference represents the invoice number, so the customer enters the invoice number in the credit reference field.
In this way, when importing a TXT file and posting the bank statement, the system recognizes the credit references and automatically matches customer entries with the corresponding invoices.
How to create vendors payment suggestion
Go to Electronic payment menu . Select bank you want to work with. Next step is to choose Preparation - El. payment journal will open. Choose option Prepare/Suggest vendor payments . In new window, define important filters:
- Last payment date : Last invoice date that will be included in payment suggestions; all entries before that date and on the date will be included
- Use vendor priority : if there are limited payment funds, type in Available amount LCY and along with this filed the system will suggest lines by priority until this limit is entirely used
- Posting date
- Summarize per vendor : activate this option if all vendor entries need to show as summarized in one line
- New doc. no. per line - type manually if no. series are not set up If there are already suggested lines in other journal batch, the system will show warning, escaping the possibility to have duplicated payments:

Vendor payments confirmation
Next step is to select and confirm lines for payment. If all the lines need to be selected, choose Related/Payments/Confirmation :

Payment lines will be found in Confirmation at the Electronic payment menu:

How to create employee payment suggestion

Similar to Vendor payment suggestion, go to Electronic payment menu, choose Preparation :
- Suggest Vendor Payments.
- Suggest Employee Payments.
Next thing to fill in is the request page

Payment import and export files
How to export payment journal lines file
After the payment lines for vendors and/or employees are confirmed, these can be exported as txt. file, ready for import within the electronic payment app.
To export this file, go to Confirmation/Related/Payments/E-Payment export :

How to import bank statement
From Electronic payment menu select Statement :

Next, go to Related/Payments/E-payment import
New window will appear, choose file for import (previously exported from el. payment app). During importing process, the system searches for customers/vendors by bank account. If there is no bank account on customer/vendor card, there will be a notification warning.

Even though some customer/vendors have not been found, all the transaction will be imported. Depending on side (Debit/Credit), the system will choose Account type (Vendor or Customer) leaving account no. empty if those lines have not been found.
If payment needs to post as prepayment, there is a filed Prepayment that has to be checked.
Vendor and customer ledger entries that are found by credit reference no. will be selected for application in "Applies to doc. no". If desired, further entries application can be completed through this journal.
After regular control of the statement, it can be posted through "Post" action on header.
Sales & Receivables Setup
On the Sales & Receivables Setup page there is a field Def. Credit Ref. Formula Code. The field is adjusted and the formula is defined for further recognition. The field will be filled in on sales invoices and on posted sales invoices.

To create a code, choose select from full list.


- Code name is entered
- Enter the description for the code
- Model - it can be filled in, it is not a mandatory field
- Formula - gives us a list where we can choose parameters
- The maximum number of parameters allowed to be selected
Sales invoices - Invoice Detailes 
Posted sales invoice - Invoice Detailes 
The Credit Reference No field will also be filled in on the statement. When importing txt format.
Need more help?